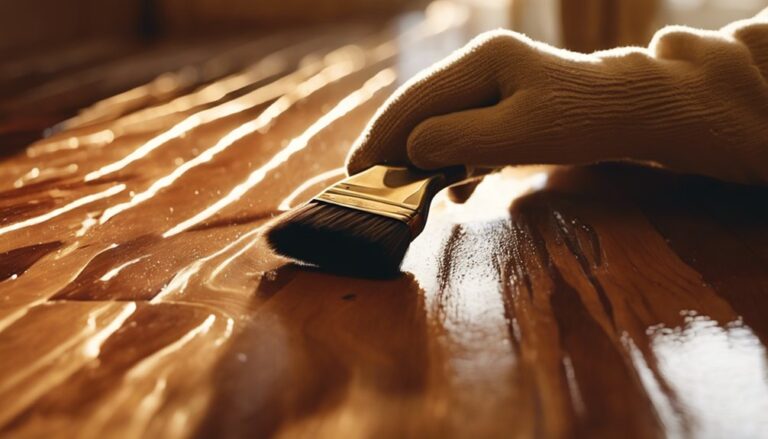
To apply polyurethane to floors, start by thoroughly cleaning and preparing the surface, filling any gaps and sanding lightly. Choose either oil-based or water-based polyurethane based on desired durability and drying time. Use high-quality synthetic brushes or lambswool applicators for a smooth finish, applying thin, even coats along the wood grain while maintaining a wet edge to prevent lap marks. Allow the first coat to dry completely, then lightly sand before applying additional coats. Remember that curing times vary, so avoid heavy foot traffic during this period. More techniques and tips await to perfect your application process.
Understanding Polyurethane Types
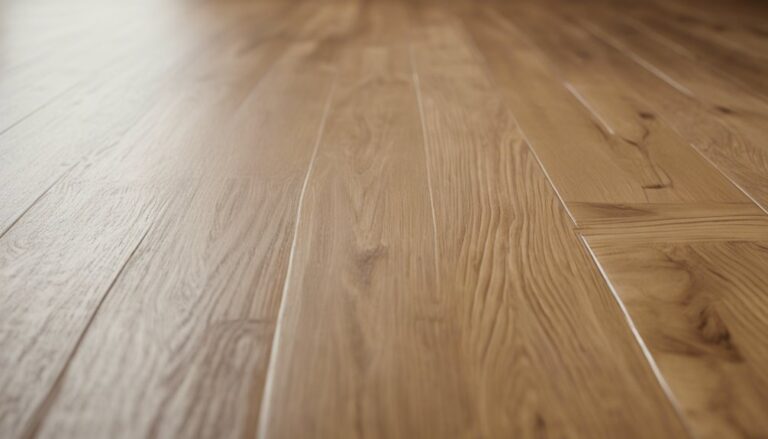
When you're choosing a polyurethane for your floors, it's essential to understand the different types available. Oil-based polyurethane is known for its durability and rich amber hue, making it a popular choice for hardwood floors. It typically requires longer drying times and emits stronger fumes, so proper ventilation is essential during application. On the other hand, water-based polyurethane dries quickly, allowing for faster project completion. It offers a clear finish, preserving the natural appearance of the wood, but may not provide the same level of durability as its oil-based counterpart. Weighing the pros and cons of oil-based versus water-based polyurethane will help you make an informed decision, ensuring your floors not only look stunning but also withstand daily wear and tear.
Preparing Your Floor
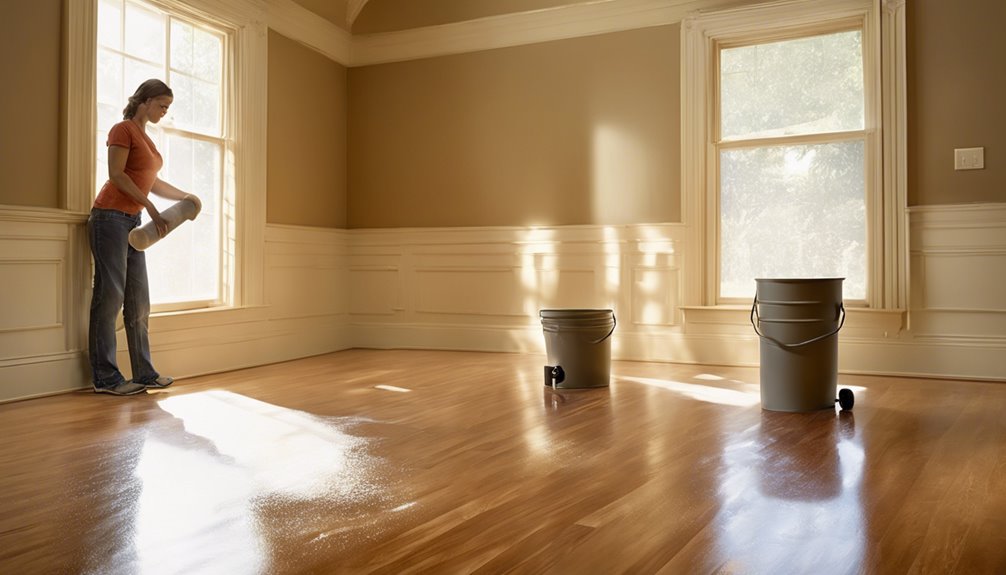
Before applying polyurethane, it is crucial to prepare your floor properly to guarantee ideal adhesion and a flawless finish. Start with thorough floor cleaning to remove any dirt, dust, or debris that could interfere with the application. Next, conduct a surface inspection to identify any imperfections or damage that need addressing. Follow these steps:
- Sweep or vacuum the floor rigorously.
- Mop using a suitable cleaner, ensuring the surface is dry.
- Fill in cracks or holes with wood filler.
- Sand the floor lightly to promote adhesion.
- Wipe down the surface with a tack cloth to eliminate dust.
Gathering Necessary Tools
Gathering the right tools is essential for a successful polyurethane application on your floors. Start by identifying the necessary tool types: a high-quality polyurethane applicator, brushes, a roller, and a tray. You'll also need a vacuum, tack cloths, and protective gear like gloves and goggles.
Before you begin, verify all your tools are in good condition; proper tool maintenance can greatly affect the outcome. Clean brushes and rollers thoroughly after use, and check for any wear or damage. Having the right tools and maintaining them well allows you to work efficiently, guaranteeing a smooth finish. With everything prepped, you're ready to achieve that flawless floor you desire, giving you the freedom to enjoy your space.
Applying the First Coat
Before applying the first coat of polyurethane, guarantee the floor surface is properly prepared by cleaning and sanding it to remove any imperfections. Select the right tools, such as a high-quality applicator or brush, to achieve a smooth finish. When applying the polyurethane, focus on creating even coats to avoid streaks and achieve maximum durability.
Prepare the Floor Surface
To achieve a flawless finish when applying the first coat of polyurethane, you must thoroughly prepare the floor surface. Start with thorough floor cleaning to remove dust, dirt, and debris. Once clean, conduct a surface inspection to identify any imperfections that could affect adhesion.
Consider these essential preparation steps:
- Use a vacuum to eliminate fine particles.
- Mop with a suitable cleaner to guarantee a pristine surface.
- Sand the floor to smooth out any rough spots.
- Fill in cracks or gaps with an appropriate filler.
- Allow the surface to dry completely before proceeding.
Choose the Right Tools
Choosing the right tools is essential for a successful application of the first coat of polyurethane on your floors. Start with a high-quality synthetic brush or a lambswool applicator for smooth and even coverage. Your tool selection should prioritize durability and effectiveness to guarantee a flawless finish. If you opt for a roller, choose a short nap to minimize texture, as this'll help achieve a sleek surface. Additionally, keep a paint tray handy for easy access to your polyurethane. For edges and corners, a smaller brush can provide precision. Familiarize yourself with proper application techniques, including maintaining a wet edge to prevent lap marks. Selecting the right tools will set the foundation for a stunning floor finish you'll love.
Apply Even Coats
Start by applying a thin, even coat of polyurethane to your floors to secure ideal results. Proper coat thickness is essential for durability and aesthetic appeal. Utilize effective applying techniques to guarantee uniform coverage:
- Use a high-quality synthetic brush for smooth application.
- Work in sections, maintaining a wet edge to avoid lap marks.
- Hold the brush at a 45-degree angle for better control.
- Apply in long, sweeping strokes, following the wood grain.
- Avoid over-brushing, which can lead to bubbles and unevenness.
Sanding Between Coats
Although it may seem counterintuitive, sanding between coats of polyurethane is an essential step in achieving a smooth, durable finish on your floors. This process helps create a better bond between layers, preventing peeling or chipping. You'll want to choose the right sanding techniques and grit selection; typically, a fine grit like 220 is ideal for this task. Lightly sand the surface with a buffer or sanding block, ensuring you remove any imperfections or dust nibs. After sanding, always vacuum and wipe the surface with a tack cloth to eliminate debris. This meticulous prep sets the stage for a flawless finish, allowing the subsequent layers to adhere properly and providing you with the freedom to enjoy your beautifully finished floors.
Applying Additional Coats
Applying additional coats of polyurethane is vital for achieving a robust and long-lasting finish on your floors. When applying these coats, keep in mind several additional coat considerations to guarantee peak results.
- Choose a high-quality polyurethane.
- Wait the recommended time between coats for proper bonding.
- Use a clean applicator for each layer.
- Maintain a dust-free environment to avoid imperfections.
- Inspect each coat for smoothness before proceeding.
It's important to monitor the timing between coats; typically, you should wait 4-6 hours for water-based formulas and 24 hours for oil-based ones. This careful approach not only enhances durability but also provides a beautiful, glossy finish that allows your floors to shine with freedom and elegance.
Drying and Curing Time
When applying polyurethane, understanding the drying and curing times is essential for achieving a durable finish. Various factors, such as temperature, humidity, and ventilation, can greatly influence how quickly the polyurethane dries. Additionally, the curing process is important for the long-term performance of the coating, ensuring it reaches its full hardness and resilience.
Factors Affecting Dry Time
As you prepare to apply polyurethane to your floors, it's crucial to understand that several factors can greatly impact both drying and curing times. Key elements include:
- Temperature effects: Warmer temperatures speed up drying, while cold can slow it down.
- Humidity levels: High humidity can extend drying time considerably.
- Air circulation: Good airflow helps evaporate solvents quicker.
- Coat thickness: Thicker applications take longer to dry.
- Type of polyurethane: Oil-based formulas generally require longer drying times than water-based ones.
Curing Process Explained
The curing process of polyurethane is vital for achieving a durable and resilient finish on your floors. This process unfolds in distinct curing stages, starting with the initial drying phase, where moisture levels in the finish decrease considerably. During this stage, it's essential to maintain ideal environmental conditions; excess humidity can extend drying times and compromise adhesion.
As the polyurethane continues to cure, it undergoes a chemical reaction that strengthens the bond between layers. The final curing phase can take up to 30 days, though the surface may feel dry sooner. During this time, avoid heavy foot traffic to guarantee the finish sets properly. Understanding these stages will help you achieve the finest results, enhancing the longevity and appearance of your floors.
Maintaining Finished Floors
Although maintaining finished floors may seem intimidating, regular care is essential to preserve their beauty and durability. Establishing effective cleaning routines and implementing protective measures can go a long way. Here are some key practices to keep your floors in top condition:
- Sweep or vacuum regularly to remove dirt and debris.
- Use a damp mop with a gentle cleaner designed for your floor type.
- Place mats at entryways to reduce tracked-in dirt.
- Avoid harsh chemicals that can damage the finish.
- Apply floor protectors under furniture to prevent scratches.
Troubleshooting Common Issues
When you encounter issues with your polyurethane floors, it's important to assess the problem accurately to determine the best course of action. Common mistakes include applying too thick a coat or using the wrong applicator. If you notice bubbles in your finish, it's vital to identify the cause—often, this happens from over-brushing or applying polyurethane in high humidity. Fixing bubbles requires you to sand down the affected area gently and reapply a thin coat. Confirm your workspace has proper ventilation, and always stir, don't shake the polyurethane to avoid air incorporation. By addressing these issues promptly and effectively, you can maintain the beauty and durability of your floors while enjoying the freedom they bring to your space.
Frequently Asked Questions
Can I Apply Polyurethane Over Painted Floors?
Yes, you can apply polyurethane over painted floors, but proper painted floor preparation is essential. Start by ensuring the paint is fully cured and scuff-sand the surface to create a good bond. Clean the floor thoroughly to remove dust and debris. When applying polyurethane, use appropriate application techniques like a high-quality brush or roller for even coverage. Allow adequate drying time between coats to achieve a durable, long-lasting finish that enhances your painted floor.
How Long Does Polyurethane Last on Floors?
Did you know that properly applied polyurethane can last anywhere from 5 to 10 years on floors? This impressive polyurethane longevity hinges on several factors, including the type of finish used and the level of floor maintenance you commit to. Regular cleaning and minimizing foot traffic can extend its lifespan considerably. To maintain that fresh look, consider periodic re-coating every few years, which keeps your floors protected and enhances their durability.
Is It Safe to Apply Polyurethane Indoors?
Yes, it's safe to apply polyurethane indoors, but you need to take certain precautions. Confirm proper indoor ventilation by opening windows and using fans to circulate air. This helps dissipate fumes that can be harmful. Also, consider wearing a mask and gloves for added safety. Make sure you follow the manufacturer's guidelines for application and drying times to minimize any risks. Prioritizing these safety measures makes the process much safer for you.
How Can I Tell if My Floor Needs Recoating?
To determine if your floor needs recoating, conduct a thorough floor inspection. Look for coating signs like scratches, dull spots, or discoloration. If the surface feels rough or sticky, it's also a clear indicator. You might notice wear in high-traffic areas, suggesting the protective layer has worn thin. If you see any of these signs, it's likely time to reapply to maintain your floor's beauty and durability.
What Should I Do if Bubbles Appear in the Finish?
Imagine blowing bubbles on a sunny day, only to see them pop, leaving a mess. If you notice bubbles in your finish, it's essential to address them promptly. Start with bubbles removal by sanding the affected area, ensuring proper floor preparation. Afterward, clean the surface thoroughly before applying another coat. This meticulous attention to detail safeguards your beautiful finish and helps you reclaim the freedom of a flawless floor.