To level a slab floor, start by evaluating its condition for cracks or unevenness. Gather your tools, including leveling compound and a trowel. Identify the highest point using a level or straightedge and mark low areas for correction. Clean the surface thoroughly and make sure it's dry before applying your chosen leveling compound. Mix it according to instructions, and spread it evenly across the uneven spots. After it cures, inspect the surface, touching up any imperfections. Finally, consider maintaining its integrity with sealant. For a more thorough understanding, further steps and methods will guarantee ideal results.
Assessing the Floor's Condition
Before diving into the leveling process, it's crucial to assess the floor's condition. Start by employing effective floor inspection techniques, such as checking for visible cracks, uneven surfaces, and water damage. Walk across the floor and listen for any hollow sounds, which indicate potential voids beneath the surface. Use a level or straightedge to identify high and low spots—this will help you pinpoint common floor issues. Pay close attention to changes between rooms, as they often reveal significant inconsistencies. Document your findings meticulously, as this information will guide your leveling approach. By understanding the current state of your floor, you can guarantee that your leveling project leads to a stable, even surface that enhances your freedom of movement and overall comfort.
Gathering Necessary Tools
To effectively level your slab floor, you'll need to gather several essential tools that will streamline the process. Choosing the right tool types and ensuring their proper maintenance is vital for achieving ideal results. Here's a quick list to get you started:
- Leveling compound: This material helps fill in low spots.
- Trowel: For spreading the leveling compound evenly.
- Straightedge: To check the flatness of the floor.
Make sure your tools are in good working condition to avoid complications. Inspect them for wear and tear before use; this will help maintain their functionality and prolong their lifespan. With the right tools at your disposal, you're set to move forward confidently.
Measuring and Marking Levels
Accurate measuring and marking levels are essential steps in the process of leveling your slab floor. Start by using reliable measuring techniques, like a laser level or water level, to determine the highest point in your slab. From there, measure down from this point to identify low areas. Next, follow marking guidelines by using chalk lines or a straightedge to create clear visual references on the floor. Verify your marks are consistent and easily visible, as this will help you maintain accuracy during the leveling process. Remember to double-check your measurements before proceeding, as even slight discrepancies can lead to uneven surfaces. With careful measuring and clear markings, you'll set the stage for a successful leveling project.
Choosing a Leveling Method
Once you've identified the low areas of your slab floor, it's crucial to choose the right leveling method to guarantee a smooth, even surface. You have a couple of solid options:
- Self-leveling compounds: These are quick to apply and flow to fill low spots effectively.
- Traditional methods: Techniques like mud jacking or using a concrete overlay can be effective but may require more time and labor.
- Hybrid approaches: Combining self-leveling compounds with traditional methods can yield the best results based on your specific needs.
Consider factors like the extent of the unevenness, your budget, and the desired finish. Choosing wisely guarantees you achieve the freedom of a perfectly level slab floor, ready for whatever finish you envision.
Preparing the Surface
Before applying any leveling method, preparing the surface is essential for ensuring proper adhesion and effectiveness. Start by removing all surface debris, including dust, dirt, and any loose materials. A clean surface promotes a strong bond with the leveling compound. Next, conduct a moisture assessment to determine if the slab is suitably dry. Excess moisture can lead to complications, such as mold growth or compromised adhesion. If moisture levels are high, consider drying methods or moisture barriers. Once you've confirmed a clean and dry surface, you're ready for the next steps. Proper preparation not only enhances the results but also prolongs the lifespan of your leveled floor, giving you the freedom to enjoy your space without worry.
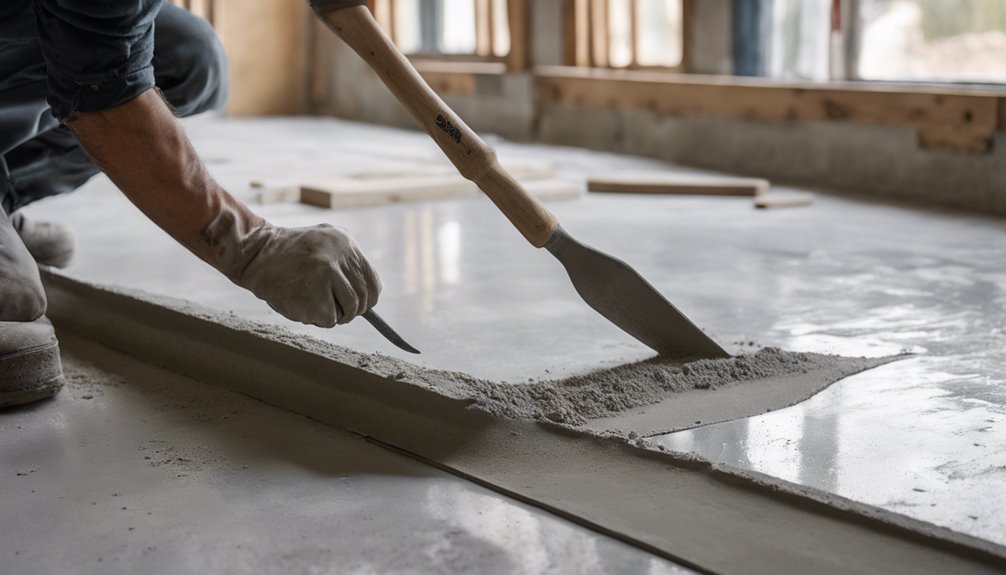
Applying Leveling Compound
Start by mixing the leveling compound according to the manufacturer's instructions, ensuring a consistent and lump-free mixture. Next, choose the right compound types based on your floor's needs. Different leveling techniques may be required for varying surfaces, so be prepared to adjust your approach.
- Use a trowel or squeegee for smaller areas.
- Consider a pouring method for larger spaces.
- Allow sufficient drying time before adding any flooring.
Pour the mixture onto the low spots, then spread it evenly, ensuring you cover all uneven areas. Monitor the thickness according to the product guidelines, and avoid overfilling. Proper application of leveling compound will yield a smooth, stable base for your new flooring.
Finishing Touches and Tips
After the leveling compound has dried and set properly, it's time to focus on the finishing touches that will enhance the durability and appearance of your slab floor. Begin with a final inspection to confirm the surface is smooth and free of imperfections. Look for any uneven areas that might need a quick touch-up. Once satisfied, consider applying a sealant to protect the floor from moisture and stains; this will also make cleaning easier. For ongoing upkeep, follow these maintenance tips: clean spills immediately, use a damp mop for routine cleaning, and avoid harsh chemicals that could damage the finish. By implementing these measures, you'll confirm your slab floor remains attractive and functional for years to come.
Frequently Asked Questions
Can I Level a Slab Floor on My Own?
Yes, you can level a slab floor on your own. With the right DIY techniques and leveling tools, it's definitely achievable. Start by evaluating the floor's level and identifying low spots. Use a self-leveling compound for larger areas or a concrete grinder for minor adjustments. Make sure you've got the necessary safety gear and follow the manufacturer's instructions for the best results. Embrace the freedom of taking on this project with confidence!
How Long Does It Take for Leveling Compound to Dry?
When it comes to drying times, it really depends on the compound types you're using. Generally, self-leveling compounds dry in about 2 to 4 hours for light foot traffic, but full curing can take up to 24 hours or more. Always check the manufacturer's guidelines for specific drying times, as they can vary. If you want to guarantee ideal results, give it ample time to dry before proceeding with any further work.
What Are the Signs of an Uneven Slab Floor?
When you're conducting a floor inspection, look for signs of an uneven slab. You might notice cracks, gaps between the floor and baseboards, or water pooling in certain areas. Unevenness can also cause doors to stick or creak. If you're using leveling techniques, these indicators will help you determine the extent of the problem. Addressing these issues early can prevent further damage and maintain the integrity of your space.
Is It Necessary to Remove Existing Flooring Before Leveling?
They say, "You can't build a house on a shaky foundation." When it comes to leveling, removing existing flooring isn't always necessary, but it often simplifies the process. Without removing it, you might encounter complications with certain leveling techniques. If you're considering new flooring options, taking out the old layer can guarantee a smoother finish. Assess your situation carefully—sometimes, less is more, but a solid base is essential for long-lasting results.
How Much Does It Cost to Level a Slab Floor?
When considering the cost to level a slab floor, you'll encounter various cost factors that can influence your budget. The size of the area, the severity of the unevenness, and the leveling options you choose all play a role. Typically, materials and labor can range from $2 to $5 per square foot. If you opt for self-leveling compounds or professional services, those costs will differ, so it's important to evaluate your needs carefully.