Imagine stepping into your bathroom and onto a shower floor that you built with your own hands. The satisfaction of creating something both beautiful and functional is unmatched.
If you’ve ever considered DIY renovations, you’ve probably realized how daunting they can seem. But fear not! Building a shower floor is simpler than you might think. In this guide, you’ll discover step-by-step instructions that will transform your bathroom into a personal oasis.
Whether you’re a seasoned DIY enthusiast or just starting out, this project will empower you with skills and confidence. Ready to make a splash in your home improvement journey? Dive in and discover the secrets to building a perfect shower floor that reflects your style and meets your needs. Keep reading, and you’ll soon see that the rewards are well worth the effort.
Choosing Materials
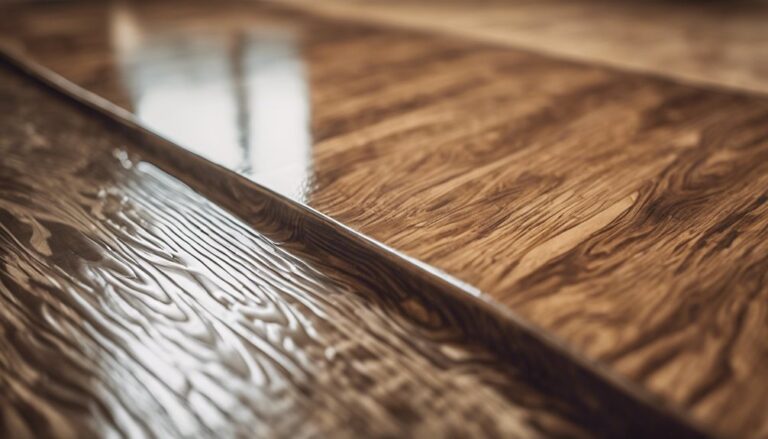
Tiles come in many styles and colors. Ceramic tiles are easy to clean. Porcelain tiles are strong and last long. Glass tiles can make your shower look bright. Stone tiles give a natural look. Each tile has its own feel and look. Choose what you like best. Make sure it fits your style.
Keeping water out is very important. Waterproof membranes protect your floor. Use liquid waterproofing for easy application. Sheet membranes are another good option. These stop leaks and keep your floor dry. Use sealants on tile edges. This prevents water from getting under tiles. Always check for any leaks.
| Tool | Purpose |
|---|---|
| Tile Cutter | Cut tiles to fit |
| Trowel | Spread mortar evenly |
| Level | Check floor is flat |
| Sponge | Clean off excess grout |
| Drill | Secure backer board |
Preparing The Area
First, remove all items from the bathroom. Take out rugs, towels, and any other objects. Make sure the area is clean and dry. This helps in avoiding accidents. Check the floor for any cracks or damage. Fix them early to prevent problems later.
Measure the shower area carefully. Use a tape measure for this task. Write down the numbers clearly. Then, plan where everything will go. Decide where the drain will be. Make sure the plan fits your space.
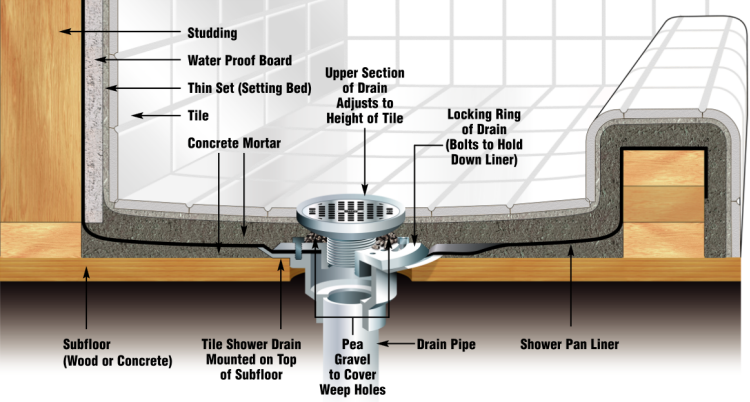
Proper drainage is important. Check the slope of the floor. Water should flow towards the drain. If not, adjust the slope. This stops water from pooling. Make sure the drain is clear and open. No blockages allowed. This ensures a smooth flow.
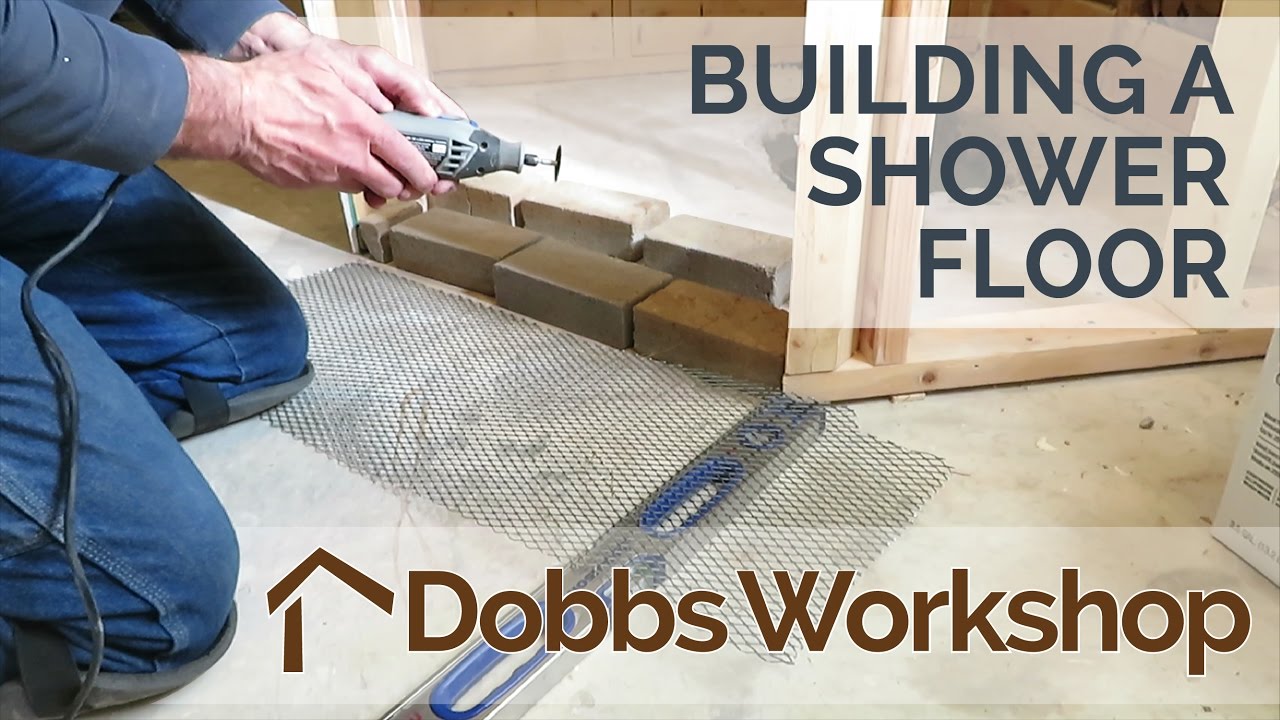
Constructing The Base
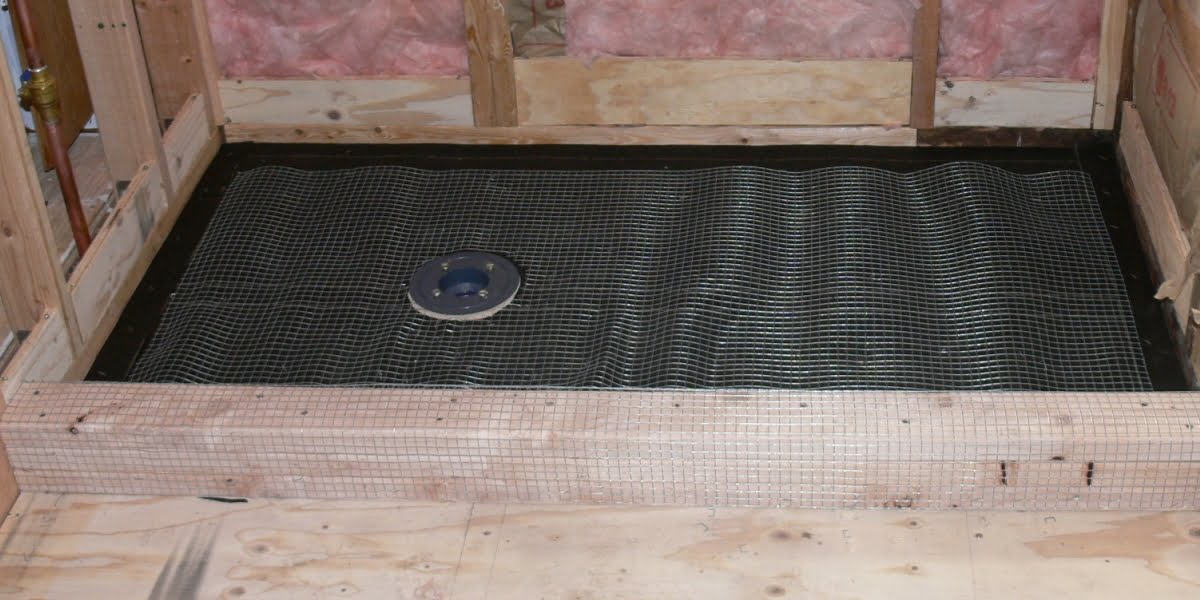
Start by gathering all the needed tools. You’ll need a bucket, water, and dry concrete mix. First, pour the dry concrete into the bucket. Then, slowly add water. Mix it well until it’s like thick mud. Make sure there are no lumps. This mix will be the strong base for your shower floor. It’s important to get the right texture. Not too dry, not too wet. This helps the concrete to set properly.
The floor should slope gently towards the drain. This helps water flow away. Use a level tool to check the slope. The slope should be about 1/4 inch per foot. This is important to prevent water from pooling. A proper slope keeps the shower clean and dry. It also prevents any water damage.
Place the drain at the lowest part of the slope. This is where water will exit. Make sure the drain fits snugly. Use a screwdriver to secure it. Test the drain to ensure water flows out smoothly. The drain is crucial for a working shower. It keeps the floor dry and safe.
Waterproofing The Floor
Roll out the waterproof membrane on the shower floor. Cut it to fit the area. Make sure it covers all corners. Press it firmly so it sticks well. Use a roller for even pressure. Check for any bubbles or wrinkles. Smooth them out with a hand. Trim edges for a neat finish.
Seal the joints with waterproof tape. Press the tape down firmly. Apply sealant in the corners. Use a brush for even spreading. Cover every gap and crack. Let it dry for a few hours. Check for missed spots. Add more sealant if needed.
Fill the shower floor with water. Watch for leaks. Check around the corners and joints. Look for water dripping out. Mark any leak spots. Fix them with more sealant. Repeat the test until no leaks are found. Ensure the floor is dry before using.
Laying The Tile
Pick a tile layout that fits your bathroom style. Center the tiles for a neat look. Use spacers to keep tiles straight. This helps avoid crooked lines. Try a dry layout first. Move tiles around until you like the look.
Some tiles will need to be cut. Measure carefully before cutting. Use a tile cutter for clean edges. Safety goggles protect your eyes from tiny bits. Double-check your measurements. This avoids waste and saves time.
Mix the mortar to a smooth paste. Apply with a trowel in small sections. Press tiles into the mortar firmly. Check each tile’s level. Wipe away excess mortar quickly. This keeps your tiles clean and neat.
Grouting And Sealing
Start by mixing the grout. Follow the instructions on the bag. Use a bucket and a trowel. Make sure the mix is thick like peanut butter. Spread the grout on the tiles. Push it into the gaps with a rubber float. Move the float in a diagonal direction. This helps fill the gaps well.
After applying, wait for the grout to set a bit. Use a damp sponge to clean the tiles. Wipe in a circular motion. Rinse the sponge often. This keeps it clean. Make sure no grout is left on the tile surface. It dries quickly and gets hard.
Sealing is very important. Use a tile sealer. Apply it with a clean brush. Make sure to cover all tiles. Wait for the sealer to dry. This keeps water out. It also makes the tiles last longer.
Finishing Touches
Installing shower fixtures is an exciting step. First, check all the parts you need. Use a wrench to fix the showerhead. Make sure it is tight. Then, attach the faucet. Test the water flow. Adjust if needed. Ensure everything is secure. It prevents leaks.
Final cleanup is important for a neat shower. Gather all tools and unused materials. Wipe the floor with a clean cloth. Ensure no dust or debris is left. Check the tiles. They should be smooth and shiny. A clean shower looks great and feels fresh.
Maintenance tips help keep your shower new. Dry the floor after each use. This stops mold from growing. Use mild soap for cleaning. Avoid harsh chemicals. Check for loose tiles often. Fix them right away. A little care goes a long way.
:max_bytes(150000):strip_icc()/SPR-how-to-build-a-shower-pan-5087841-117f3d83f7a24c33816fb67aef8b9983.jpg)
Frequently Asked Questions
How Do You Prepare A Shower Floor Base?
To prepare a shower floor base, start by cleaning the area thoroughly. Then, install a waterproof membrane to prevent leaks. Ensure the surface is level and smooth before applying any materials. Proper preparation ensures durability and prevents water damage.
What Materials Are Best For Shower Flooring?
Ceramic tiles are a popular choice for shower floors due to their durability and water resistance. Other options include natural stone, vinyl, and glass tiles. Choose materials that are slip-resistant and easy to maintain for optimal safety and longevity.
How Do You Ensure Proper Drainage?
Ensure proper drainage by installing a sloped shower floor directing water to the drain. The slope should be gentle, typically about 1/4 inch per foot. This prevents water pooling and promotes efficient drainage, keeping the shower area dry and clean.
How Long Does It Take To Build A Shower Floor?
Building a shower floor usually takes several days, depending on complexity and materials used. The process includes preparation, installation, and drying times. Allow adequate time for each step to ensure a durable and high-quality finish.
Conclusion
Building a shower floor doesn’t need to be complicated. Follow these steps for a solid foundation. Remember, preparation is key. Gather your materials first. Measure accurately for best fit. Mix mortar carefully. Lay tiles with precision. Ensure proper drainage. Seal edges to prevent leaks.
Allow time for everything to set. Check for imperfections. Practice patience throughout the process. Celebrate your finished project! Enjoy a functional shower floor that lasts. You’ve got this! Making a shower floor can be rewarding. Keep learning and improving your skills.
Share your success with others. Happy building!