You’ll want to start by gathering the right tools like a scraper, gloves, and an adhesive remover suited for your floor type. Test the remover on a small spot to avoid damage. Then, soften the glue gently with a hairdryer before applying the remover. Scrape off the glue carefully, clean the area with soapy water, and dry it thoroughly. Inspect for any leftover residue or damage. Follow these clear steps, and you’ll find it easier to restore your floor effectively.
Gather the Necessary Tools and Materials
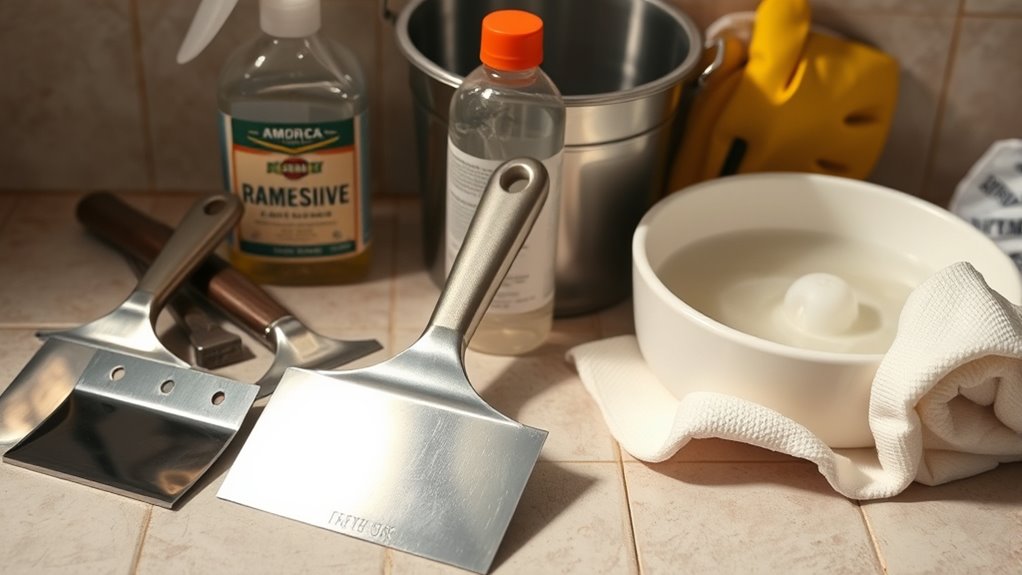
Before you begin removing sticky tile glue, you’ll need to gather a few essential tools and materials to make the job easier and more effective. Start with a tools checklist: scraper or putty knife, wire brush, gloves, safety goggles, and a bucket. For material selection, consider adhesive removers designed for your floor type—water-based for wood, stronger solvents for tile or concrete. You might also want rags or sponges for cleanup. Having everything ready means you won’t waste time searching mid-task. Choose materials that balance efficiency and safety, avoiding harsh chemicals if possible. Being well-prepared with the right tools and materials lets you regain control over the project quickly and confidently, giving you the freedom to restore your floor without unnecessary hassle.
Test a Small Area for Surface Compatibility
Once you have your tools and materials ready, the next step is to test the adhesive remover on a small, inconspicuous spot of your floor. This surface testing is essential to guarantee the product won’t damage or discolor your flooring. Apply a small amount of remover and wait a few minutes, then gently wipe the area. Look for any signs of discoloration, surface damage, or texture changes. This compatibility check helps you avoid costly mistakes and confirms the remover is safe for your specific floor type. If the test spot remains intact and unaffected, you’re clear to proceed with confidence. If not, consider trying a different product or method to protect your floor’s finish while effectively removing the sticky tile glue.
Soften the Glue With Heat
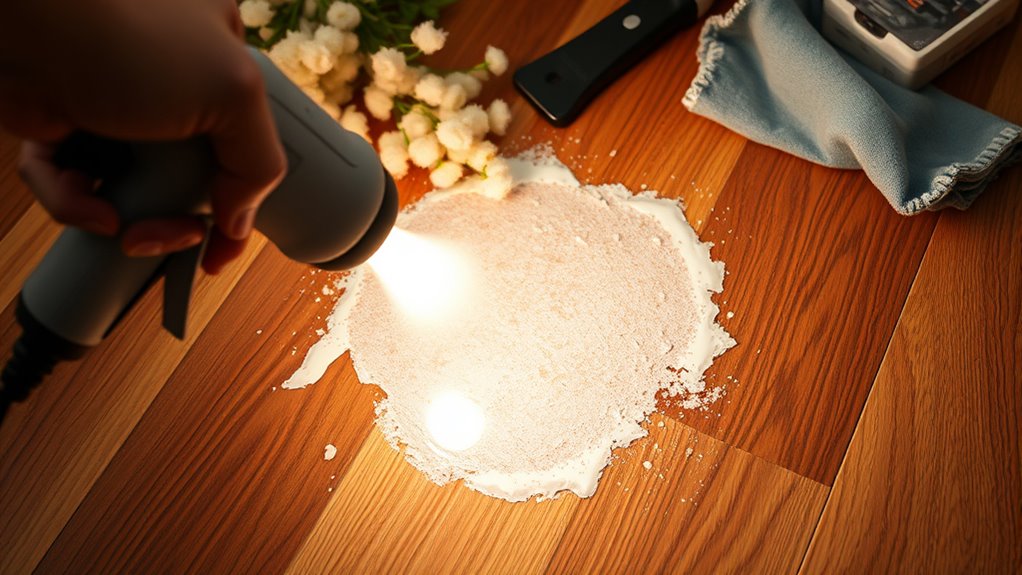
A single heat source, like a hairdryer or heat gun, can make softening sticky tile glue much easier. Different heat sources offer varying temperatures, so choose one that suits the glue types you’re dealing with. Start by setting your heat source to a moderate temperature to avoid damaging your floor. Hold it a few inches above the glue and move it slowly to evenly warm the adhesive. As the glue heats up, it’ll soften and become more pliable, simplifying removal. Be cautious with synthetic glue types, which can release fumes if overheated. Using heat sources thoughtfully gives you control over stubborn glue, helping you break free from sticky messes without harsh chemicals or excessive scraping. This method saves time and preserves your floor’s surface integrity.
Apply a Suitable Adhesive Remover
You’ll want to pick an adhesive remover that’s compatible with your floor type to avoid damage. Apply it evenly, following the product instructions, and allow it to sit long enough to break down the glue. Don’t forget to wear gloves and guarantee good ventilation to protect yourself during the process.
Choosing the Right Remover
Although removing sticky tile glue can be tough, choosing the right adhesive remover will make the job much easier and protect your floor from damage. Start by considering remover types: solvent-based removers are powerful but may harm sensitive surfaces, while water-based options are gentler and eco-friendlier. If you prefer a safer approach, natural alternatives like citrus-based or vinegar solutions can break down glue without harsh chemicals. Always check the remover’s compatibility with your floor material to avoid stains or warping. Testing a small, hidden area first helps guarantee no damage occurs. By selecting the right remover, you maintain your floor’s integrity and enjoy a smoother, less stressful cleanup process—giving you the freedom to restore your space efficiently and confidently.
Application Techniques
Start by preparing the floor and your workspace to confirm the adhesive remover works effectively. Clear the area of dust, dirt, and debris—this surface preparation confirms the remover penetrates the glue, not just the grime. Choose an application technique that suits your floor type and glue residue. You can apply the remover with a brush, roller, or sponge, spreading it evenly to cover all sticky spots. Let it sit according to the product’s instructions, allowing the remover to break down the glue’s bond. Avoid rushing this step; proper application techniques maximize effectiveness and save you effort later. After the waiting period, gently scrape or wipe off softened glue, repeating if necessary. Good surface preparation combined with correct application techniques gives you a clean, glue-free floor quicker.
Safety Precautions
When choosing an adhesive remover, make sure it’s compatible with your floor type to prevent damage. Always wear gloves to protect your skin and maintain proper ventilation in the room to avoid inhaling harmful fumes. These simple precautions keep you safe while working freely.
| Precaution | Why It’s Important | Tips for Success |
|---|---|---|
| Glove Usage | Prevents skin irritation | Use chemical-resistant gloves |
| Ventilation | Reduces toxic fume buildup | Open windows and use fans |
| Floor Compatibility | Avoids surface damage | Test remover on a small spot |
Follow these safety steps to confidently remove sticky tile glue without risking harm to yourself or your floors.
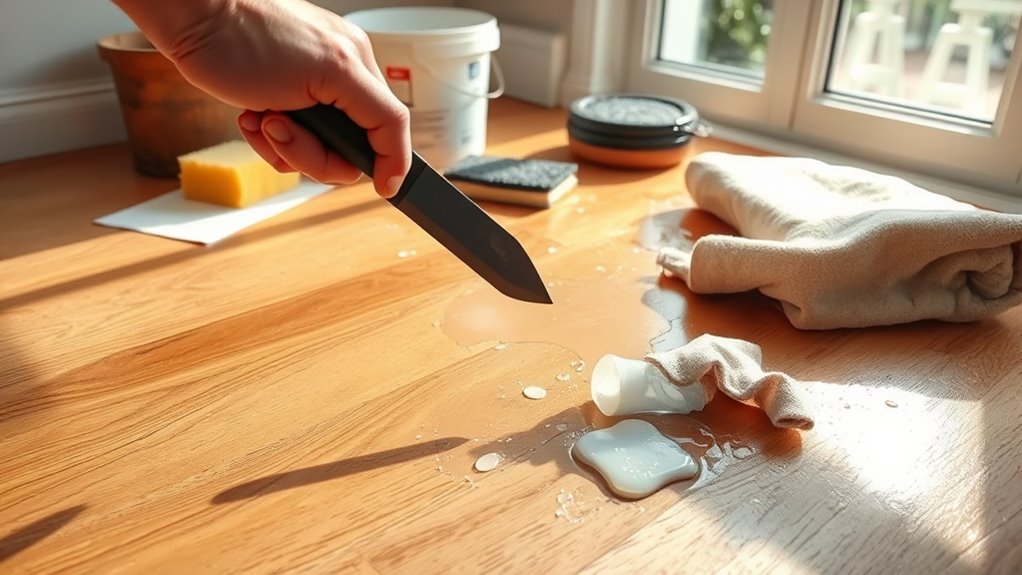
Scrape Off the Glue Gently
Carefully use a putty knife or a plastic scraper to lift the sticky tile glue from the floor without damaging the surface beneath. Start at the edges of the glue patch, gently working your way inward. Apply steady, even pressure and avoid sharp or aggressive scraping techniques that could scratch or gouge your floor. If the glue feels stubborn, don’t force it; instead, try loosening it with a bit of warm water or a recommended solvent before scraping again. Your goal is to remove as much glue residue as possible in this step, but patience is key. Taking your time will help you preserve the floor finish and prevent unnecessary damage, giving you the freedom to enjoy a clean, smooth surface ready for the next cleaning phase.
Clean the Residue With Soap and Water

Once you’ve gently scraped away the bulk of the sticky glue, you’ll notice some residue still clinging to the floor. To free your space from this stubborn film, use effective cleaning techniques with soap and water or soap alternatives. Here’s how to proceed:
- Mix warm water with a few drops of mild dish soap or a gentle soap alternative like castile soap.
- Dip a soft cloth or sponge into the solution, wring out excess water, and gently scrub the residue in circular motions.
- Rinse the area with clean water and wipe dry to prevent any slippery spots.
This simple step helps remove leftover glue without harsh chemicals, giving you freedom to enjoy a clean, smooth floor.
Dry and Inspect the Floor Surface
Although the floor may look clean after scrubbing, you’ll want to thoroughly dry the surface to prevent any moisture damage or slipping hazards. Use a clean, dry cloth or mop to absorb all remaining water, guaranteeing the floor is completely dry. Once dry, conduct a careful surface assessment to evaluate the floor condition. Look closely for any stubborn glue spots, discoloration, or damage like scratches or gouges. This inspection helps you decide if further cleaning or repairs are needed before proceeding. Taking the time for this step guarantees your floor is safe, smooth, and ready for whatever comes next, giving you the freedom to enjoy a clean, glue-free surface without worry or risk.