To install vinyl plank flooring, start by gathering the necessary tools like a tape measure, utility knife, and spacers. Clear the installation area of existing flooring and debris, then clean the surface. Acclimate the planks in the room for 48-72 hours to adjust to the environment. Begin laying the first row against a straight wall, ensuring you leave a 1/4 inch gap. Stagger the planks for a natural look, and double-check their alignment. After securing all planks, trim edges and install baseboards for a polished finish. Now, let's look at tips for maintaining your new floor.
Gather Necessary Tools
Before you plunge into installing vinyl plank flooring, you'll need to gather a few essential tools to guarantee the job goes smoothly. Start with measuring tools like a tape measure and a square to confirm accurate dimensions of your space. This will help you avoid any costly mistakes. Next, you'll need cutting tools. A utility knife or a vinyl plank cutter will make it easy to trim planks to fit your area perfectly. Don't forget a straight edge to guide your cuts. Having these tools on hand not only simplifies the installation process but also empowers you to tackle the project with confidence. With the right equipment, you're one step closer to transforming your space into something you truly love.
Prepare the Installation Area
With your tools ready, the next step is to prepare the installation area for your vinyl plank flooring. Begin with thorough floor preparation; remove any existing flooring, baseboards, or furniture that might obstruct your work. Check for any nails or staples left behind that could damage your new flooring. Once the area's clear, focus on surface cleaning. Sweep or vacuum to eliminate dust and debris, then mop with a damp cloth to guarantee a smooth, clean surface. If you find any uneven spots, consider leveling the floor to create a stable foundation for your vinyl planks. A well-prepared area not only aids in installation but also enhances the longevity of your flooring, giving you the freedom to enjoy your space.
Acclimate Vinyl Planks
To guarantee your vinyl planks perform at their best, acclimating them to the room's temperature and humidity is essential. Start the acclimation process by bringing the planks into the room where they'll be installed. Ideally, let them sit for 48 to 72 hours. This allows the planks to adjust to the environment, reducing the risk of expansion or contraction after installation. Keep in mind temperature considerations; the ideal range is between 60°F and 80°F. Avoid placing the planks in direct sunlight or near heating vents, as these can create uneven conditions. By taking these steps, you'll ascertain your vinyl flooring looks great and lasts for years, giving you the freedom to enjoy your space without worry.
Lay the First Row
After allowing your vinyl planks to acclimate, it's time to lay the first row. Start by selecting a straight wall as your reference point for first row placement. Place the first plank with the tongue side facing the wall, leaving a small expansion gap—about 1/4 inch—between the plank and the wall. Use alignment techniques by ensuring the plank is level and straight; you can use a chalk line for accuracy. Continue laying planks end to end, staggering the seams for a more natural look. If necessary, cut the last plank to fit, maintaining that critical gap. Double-check your alignment as you go—getting this first row right will set the stage for the rest of your installation.
Complete the Installation
Once you've laid the last row of your vinyl plank flooring, it's time for the final touches and trimming to guarantee a polished look. You'll want to carefully trim any excess material and install baseboards or connectors for a seamless finish. Finally, don't forget to clean the area and follow maintenance tips to keep your new flooring looking great for years to come.
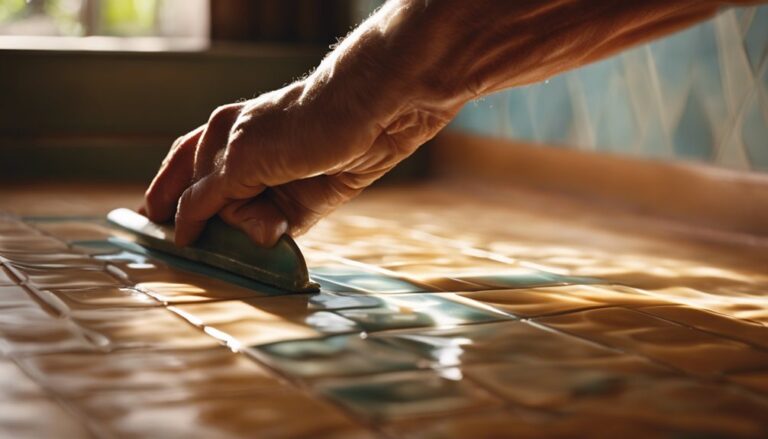
Final Touches and Trimming
Completing your vinyl plank flooring installation involves several essential final touches and trimming to secure a polished look. Start with final inspections to confirm all planks are securely in place and there are no gaps. For trimming, use a utility knife for clean cuts along the edges where the flooring meets walls or other surfaces. Consider employing different trimming techniques, like undercutting door frames for a seamless changeover. Remember to install baseboards or quarter rounds to cover any expansion gaps, which not only enhances the appearance but also protects the edges of your flooring. Finally, check for any irregularities, confirming a smooth, professional finish that reflects your dedication to an impeccable installation. Enjoy your beautiful new space!
Cleaning and Maintenance Tips
With your vinyl plank flooring beautifully installed and all the finishing touches in place, it's important to keep it looking great for years to come. Establishing a solid maintenance schedule will help you preserve its charm. Here are some effective cleaning techniques to keep in mind:
| Frequency | Cleaning Technique | Tips |
|---|---|---|
| Daily | Sweep or vacuum | Avoid abrasive tools |
| Weekly | Damp mop with mild soap | Use a microfiber mop |
| Monthly | Deep clean with a vinyl cleaner | Follow manufacturer's advice |
| As needed | Address spills immediately | Blot, don't rub |
Finishing Touches
Now that your vinyl plank flooring is in place, it's time to focus on the finishing touches that will enhance the overall look. You'll want to contemplate trim installation techniques to guarantee a seamless shift from floor to wall, as well as explore baseboard replacement options that complement your new flooring. Properly addressing these details will give your space a polished and professional appearance.
Trim Installation Techniques
Although you've already laid down your vinyl plank flooring, the final step of trim installation is essential for achieving a polished look. Start by selecting trim styles that complement your flooring—think quarter round, shoe molding, or even decorative casing. Each trim style serves a purpose, covering gaps while enhancing aesthetics.
Next, choose trim materials that suit your environment; options like wood, MDF, or PVC offer durability and style. Measure your walls carefully, cutting the trim to fit snugly. Use a miter saw for clean angles, especially at corners. Secure the trim with finishing nails or adhesive, ensuring everything sits flush against the wall. Finally, caulk any gaps for a seamless finish, and you'll enjoy a refined appearance in your space.
Baseboard Replacement Options
Choosing the right baseboard can dramatically enhance the overall look of your newly installed vinyl plank flooring. Baseboards not only provide a polished finish but also hide gaps and imperfections. Here are some baseboard replacement options to evaluate:
- MDF (Medium Density Fiberboard) – Affordable and easy to paint, perfect for a smooth finish.
- Pine – A classic choice with a natural look, offering durability and versatility.
- PVC – Water-resistant and perfect for high-moisture areas, ensuring longevity.
- Primed Wood – Ready for painting, giving you freedom to match any decor.
Explore various baseboard styles and replacement materials to find the perfect match for your space. Your choice will greatly impact the overall aesthetic of your flooring.
Frequently Asked Questions
Can I Install Vinyl Plank Flooring Over Existing Carpet?
Installing vinyl plank flooring over existing carpet can feel like trying to build a house on a shaky foundation; it's not advisable. For a proper vinyl flooring installation, the carpet needs to be removed first. Carpets create uneven surfaces and moisture issues that can damage your new flooring. By taking the time to remove the carpet, you'll guarantee a stable base that allows your vinyl planks to shine and last longer.
What Is the Lifespan of Vinyl Plank Flooring?
The lifespan of vinyl plank flooring typically ranges from 10 to 30 years, depending on several lifespan factors. High-quality products and proper installation can extend its durability. To maximize your flooring's lifespan, follow some maintenance tips: clean spills promptly, use a microfiber mop for regular cleaning, and avoid harsh chemicals. Additionally, placing rugs in high-traffic areas can prevent wear. By taking these steps, you can enjoy your flooring for years to come.
How Do I Clean Vinyl Plank Flooring After Installation?
Ever wonder how to keep your new floors looking fresh and vibrant? When it comes to cleaning vinyl plank flooring, you'll want to use gentle cleaning techniques. Start by sweeping or vacuuming regularly, then mop with a damp cloth and a mild cleaner. Avoid harsh chemicals that can damage the finish. For maintenance tips, consider placing mats at entrances and quickly wiping up spills to extend your flooring's life, ensuring that freedom from worry becomes your reality.
Are There Any Warranties for Vinyl Plank Flooring?
Yes, there are warranties for vinyl plank flooring that can give you peace of mind. Typically, warranty coverage can range from 10 to 25 years, depending on the manufacturer and product line. It's important to read the fine print, as some warranties cover only specific issues, like wear and tear, while others might include moisture resistance. Be sure to register your flooring to guarantee you receive full warranty protection for the duration specified.
Can I Install Vinyl Plank Flooring in Bathrooms or Kitchens?
You might worry about water damage, but you can absolutely install vinyl plank flooring in bathrooms and kitchens. Many vinyl options offer excellent water resistance, making them perfect for high-moisture areas. Plus, some planks come with slip resistance, adding safety in those wet spaces. Just be sure to choose quality products designed for these environments, and you'll enjoy a stylish, functional floor that holds up against the demands of your home.