To build a shed floor base, first assess your location for drainage and accessibility. Gather pressure-treated lumber, plywood, and necessary fasteners. Prepare the ground by clearing debris and leveling the area. Choose a foundation type, like concrete blocks or gravel, to elevate the shed. Lay floor joists 16 to 24 inches apart, securing them to beams with screws. Once the joists are in place, attach plywood flooring, ensuring everything's aligned and gaps are minimal. Finally, apply sealants for moisture protection and check all connections for stability. There's more to optimizing your shed's structure effectively.
Assess Your Shed Location
Before you begin constructing your shed, it's crucial to assess the location where you plan to build. Start by evaluating the shed size you need; this will influence your choice of site. Consider location factors like drainage, sunlight, and accessibility. A well-drained area prevents water pooling, which can damage the shed over time. Verify the site receives adequate sunlight, especially if you plan to use it for gardening or as a workspace. Additionally, choose a spot that's easily accessible for deliveries and maintenance. Avoid areas with overhanging branches or underground utilities. By carefully considering these elements, you'll create a practical foundation for your shed that maximizes its utility and longevity, giving you the freedom to enjoy your space fully.
Gather Necessary Materials
To build a sturdy shed floor base, you'll need to gather several essential materials. Start by sourcing materials like pressure-treated lumber for durability and resistance to rot. You'll need 2x4s or 2x6s, depending on your design, along with plywood sheets for the flooring. Don't forget anchors and screws to guarantee stability. If you're considering a raised floor, gravel or concrete blocks may be necessary for support. Choose material types that suit your climate; for instance, if you're in a moist area, opt for rot-resistant options. Finally, include a moisture barrier to prevent water damage. Gathering these materials will set a solid foundation for your shed, allowing you the freedom to customize your space as you envision.
Choose the Right Foundation Type
Before you start building your shed, you need to assess the ground conditions to guarantee stability. Consider the various foundation material options available and how they suit your specific site. Also, pay attention to elevation and drainage to prevent water damage in the future.
Ground Conditions Assessment
When evaluating ground conditions for your shed floor base, it's important to take into account the soil type and drainage characteristics, as these factors directly influence the stability and longevity of your foundation. Start by examining soil stability; sandy soils drain quickly but might lack support, while clay soils retain moisture and can expand, risking structural integrity. Monitor moisture levels to determine how they fluctuate with seasonal changes. If your area has high moisture, consider elevating your shed to prevent water damage. Choosing the right foundation type, whether it's a concrete slab or piers, hinges on this examination. By understanding these conditions, you can guarantee a solid base that supports your shed and allows you the freedom to enjoy your space without worry.
Foundation Material Options
Having assessed the ground conditions and their impact on your shed's stability, the next step is selecting the right foundation material. Concrete blocks provide a sturdy and durable option that can support your shed effectively. If you prefer a wooden foundation, pressure treated wood is essential for resisting moisture and pests. A gravel base is another versatile choice, offering excellent drainage while providing a stable surface. Finally, consider metal skids, which allow for easy relocation of your shed without compromising stability. Each material has its strengths, so think about your specific needs and the local climate before making your choice. This foundation will be important in ensuring the longevity and performance of your shed.
Elevation and Drainage Considerations
To guarantee your shed remains stable and dry, considering elevation and drainage is essential in choosing the right foundation type. Start by evaluating the land's slope; using elevation techniques like building on piers or using a raised platform can help prevent water accumulation. Make certain the foundation is elevated at least a few inches above ground level to facilitate proper drainage. Incorporating drainage solutions, such as gravel beds or drainage pipes, will direct water away from your shed's base. Avoid low-lying areas where water tends to pool, as this can compromise your shed's integrity. By prioritizing elevation and drainage, you'll create a solid foundation that protects your investment and provides the freedom to store your items worry-free.
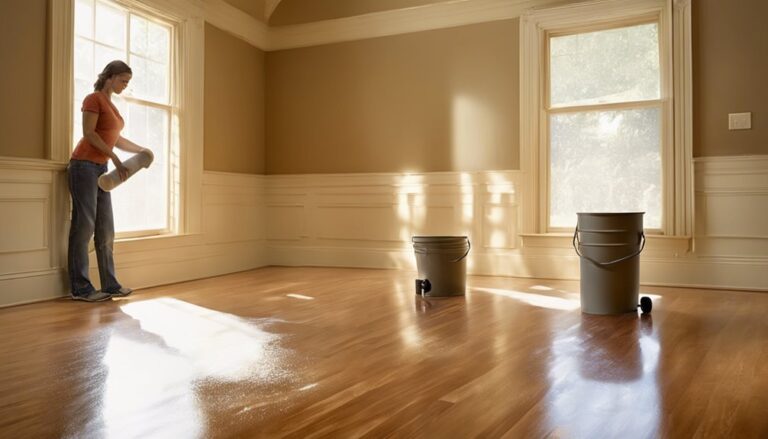
Prepare the Ground Surface
To prepare the ground surface for your shed floor base, start by clearing any debris and vegetation from the area. It's essential to have a clean workspace to guarantee proper leveling. Once cleared, level the ground to create a solid foundation for your shed.
Clear Debris and Vegetation
Begin by removing any debris and vegetation from the area where your shed will sit. This step is essential for effective site preparation. Clear away rocks, branches, and any other materials that could obstruct your shed's foundation. For vegetation removal, use tools like a shovel or hoe to dig out roots and stumps that may hinder stability. If there's significant overgrowth, consider using a brush cutter or weed whacker. Make certain the ground is as level as possible after clearing, as this will aid in the subsequent leveling process. Remember, a clean and clear site not only promotes a solid foundation but also enhances the longevity of your shed. Taking the time now will save you headaches down the road.
Level the Ground Surface
After clearing the area of debris and vegetation, you'll need to guarantee the ground surface is level. Start by using a level or a long straightedge to identify high and low spots. For effective ground leveling, mark these areas and use a shovel to adjust the soil. It's essential to compact the soil afterward to prevent future settling. Use a tamper or plate compactor for ideal soil compaction, ensuring a solid base for your shed.
| Step | Tools Needed | Purpose |
|---|---|---|
| Identify spots | Level/straightedge | Find high/low areas |
| Adjust soil | Shovel | Level the surface |
| Compact soil | Tamper/compactor | Prevent settling |
Create a Level Base
Creating a level base is essential for the stability and longevity of your shed floor. Start by evaluating the ground surface, identifying any areas that require slope adjustments. Use leveling tools like a laser level or a simple carpenter's level to check for evenness across the entire area. If you find high points, remove soil or gravel to achieve a flat surface. Conversely, if you encounter low spots, fill them in with compacted dirt or gravel. Confirm your base is at least a few inches larger than your shed's footprint for added stability. Regularly check your progress with your leveling tools to guarantee precision. A well-prepared base will enhance your shed's durability and protect your investment.
Install Support Beams
To guarantee your shed floor has the necessary strength and support, it is crucial to install support beams correctly. Start by choosing appropriate support beam types, such as pressure-treated lumber or engineered wood beams, depending on your shed's size and expected load.
Next, determine the beam spacing, typically 16 to 24 inches apart. This distance helps distribute weight evenly and prevents sagging. Mark the positions on your base frame, ensuring they're level and properly aligned.
Secure the beams with galvanized screws or brackets for maximum stability. Make sure to double-check measurements and adjust as needed before finalizing the installation. By accurately installing support beams, you'll create a solid foundation that stands up to the elements, giving you the freedom to enjoy your shed for years to come.
Lay Floor Joists
Laying floor joists is a critical step in achieving a sturdy shed floor. Start by determining the appropriate joist spacing, typically 16 inches on center for standard loads. This guarantees the floor can handle the expected load capacity without sagging or compromising structural integrity. Use treated lumber to resist moisture and decay. Secure the joists to the support beams with metal connectors or sturdy screws to enhance stability. Make sure each joist is level and aligned with the others, checking with a level tool as you go. Adjust as needed to maintain uniformity. Properly laid joists will provide a solid foundation for your shed, allowing you the freedom to store tools and equipment without worry.
Add Floorboards
Now that you've laid the floor joists, it's time to add the floorboards. Choose appropriate materials that can withstand the shed's intended use and environment. Make certain to secure the floorboards properly to guarantee a stable and durable floor.
Choose Appropriate Materials
Choosing the right materials for your shed floor is essential for ensuring its durability and functionality. You'll want to focus on wood selection that can withstand the elements, and selecting materials that offer high durability. Here's what you should consider:
- Pressure-treated lumber: Resists moisture and decay.
- Plywood: Provides a solid foundation and can support heavy loads.
- Composite materials: Durable and resistant to rot and insects.
- Cedar or redwood: Naturally resistant to moisture and pests.
- Marine-grade plywood: Ideal for high moisture areas.
Install Floor Joists
To create a sturdy foundation for your shed, installing floor joists is an essential step that supports the entire structure. Begin by determining the appropriate joist spacing, typically 16 inches on center, to guarantee even weight distribution. Choose durable joist material, such as treated lumber or engineered wood, that can withstand outdoor conditions. Cut your joists to the desired length and lay them parallel on your foundation. Secure each joist using brackets or screws, making sure they're level and properly aligned. This solid framework will provide the necessary support for your floorboards and enhance your shed's longevity. Remember, the quality of your joists greatly impacts the overall strength of the shed, so select materials that will stand the test of time.
Secure Floorboards Properly
Once you've installed the floor joists, securing the floorboards properly is crucial for creating a stable and durable surface. Start by verifying floorboard alignment is accurate; this helps prevent gaps and uneven surfaces. Use secure fasteners, like screws or nails, to attach each floorboard to the joists. Make sure to space the fasteners evenly—typically every 16 inches—providing ideal support. After fastening, double-check for any loose boards or misalignments, adjusting as necessary before proceeding.
- Choose quality materials for longevity.
- Pre-drill holes to avoid splitting.
- Use galvanized fasteners for moisture resistance.
- Consider an adhesive for added stability.
- Review local building codes for compliance.
Following these steps will guarantee your shed floor base is robust and reliable.
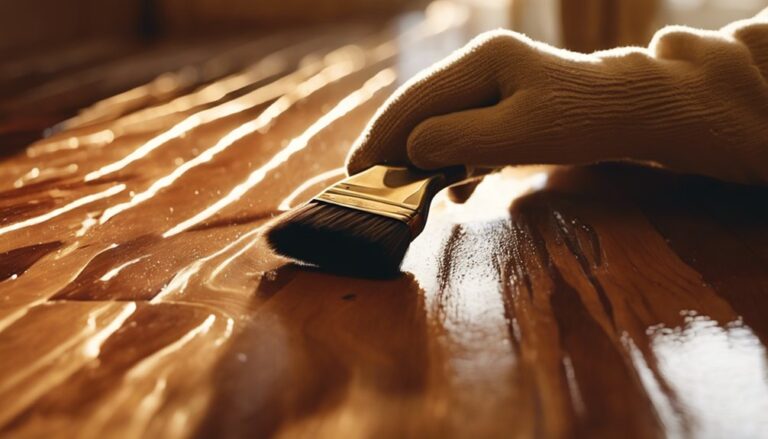
Seal and Protect
Sealing and protecting your shed floor base is essential for ensuring its longevity and durability. To achieve this, you'll want to employ effective waterproofing techniques and apply protective coatings. Here's a quick reference table to guide your choices:
| Coating Type | Benefits |
|---|---|
| Sealant | Prevents moisture penetration |
| Epoxy Coating | Resists stains and impacts |
| Varnish | Enhances appearance and durability |
| Water-Repellent Spray | Quick application and effective |
| Oil-Based Finish | Deep penetration and protection |
Choose the right products based on your needs and the local climate. By sealing and protecting your shed floor base, you can enjoy a sturdy, lasting foundation that withstands the elements.
Finalize the Shed Assembly
As you prepare to finalize the shed assembly, it's crucial to guarantee that all components are securely connected and aligned. This is your chance to confirm everything is in perfect order before you start using your shed. Follow these shed assembly tips to conduct a thorough final inspection:
- Check all screws and bolts for tightness.
- Inspect joints and connections for stability.
- Ensure the roof is properly installed and sealed.
- Verify that the door swings freely and locks securely.
- Confirm the shed is level on its base.
Frequently Asked Questions
What Is the Best Wood Type for Shed Flooring?
Choosing the best wood type for shed flooring is like picking the right foundation for a house—it's essential. You'll want to take into account pressure treated lumber for its durability and resistance to moisture. It's designed to withstand the elements, ensuring longevity. Additionally, quality plywood options can also work well, providing a solid surface. Just make sure whichever you choose meets your needs for strength and protection, giving you the freedom to enjoy your shed worry-free.
How Do I Prevent Mold and Mildew on My Shed Floor?
To prevent mold and mildew on your shed floor, focus on effective ventilation tips and moisture barriers. Guarantee your shed has adequate airflow by installing vents or leaving gaps. Use a moisture barrier, like a heavy-duty plastic sheet, beneath the flooring to block ground moisture. Regularly check for leaks or dampness, and consider using mold-resistant materials. Keeping the space dry and well-ventilated will help you enjoy a healthier, mold-free environment.
Are There Any Specific Building Codes for Shed Floors?
When it comes to building shed floors, it's essential to check your local building regulations. They often dictate specific requirements regarding materials, dimensions, and structural integrity. You might also need to obtain local permits before starting your project. Ignoring these codes can lead to fines or having to redo your work. So, make sure you're aware of what's needed to keep your shed compliant and secure, allowing you the freedom to enjoy your space.
Can I Use Recycled Materials for My Shed Floor?
You can definitely use recycled materials for your shed floor. Recycled pallets are a popular choice, offering durability and an eco-friendly option. Just make certain the pallets are in good condition and free from rot or pests. When using them, make sure they're properly secured and leveled to provide a stable base. This approach not only saves money but also reduces waste, allowing you to create your shed with a sustainable mindset.
How Often Should I Inspect My Shed Floor for Damage?
"An ounce of prevention is worth a pound of cure." You should inspect your shed floor at least twice a year. During these safety inspections, look for signs of damage and wear. Moisture checks are essential, too; excess humidity can weaken the structure. If you notice any issues, it's best to address them immediately to maintain the integrity of your shed. Staying proactive helps you enjoy your space without worry.