To cut vinyl wood plank flooring, you'll need a few essential tools: a utility knife for straight cuts, or a jigsaw/circular saw for intricate shapes. Start by measuring and marking your planks accurately. For utility knife cuts, score along the line and snap the plank; use a straight edge for clean lines. If you're using a circular saw, make sure the blade depth exceeds the plank thickness and maintain a steady pace. Always prioritize safety by wearing protective gear and keeping hands clear of cutting edges. To maximize your results, understanding specific techniques can further enhance your cutting efficiency.
Tools You Will Need
To successfully cut vinyl wood plank flooring, you'll need a few essential tools. A utility knife is crucial for straight cuts, while a jigsaw or circular saw is useful for more intricate shapes. Always make sure your blades are sharp; dull tools can lead to uneven edges and increased effort. For precise cutting techniques, a straight edge or T-square will help guide your cuts, guaranteeing accuracy. Don't overlook tool maintenance—keeping your saws and knives clean and sharp not only prolongs their life but also enhances your cutting efficiency. Finally, a measuring tape is essential for marking your planks accurately before cutting. With the right tools and proper care, you'll achieve clean cuts and a professional-looking floor.
Measuring and Marking Planks
When installing vinyl wood plank flooring, accurate measurements are essential to guarantee a proper fit. Use a reliable measuring tool to determine the lengths needed, and mark your planks clearly to guide your cuts. This precision will help you avoid mistakes and assure a professional-looking finish.
Accurate Measurements Essential
Accurate measurements are essential for ensuring a seamless installation of vinyl wood plank flooring, as even minor errors can lead to significant issues down the line. To achieve precision, utilize appropriate measuring tools and effective measurement techniques. Start by measuring the length and width of the area, and then transfer those dimensions to your planks.
Here's a quick reference table for your measurements:
| Measurement Type | Suggested Tools | Techniques |
|---|---|---|
| Area Dimensions | Tape Measure | Double-check lengths |
| Plank Dimensions | Square & Ruler | Mark cut lines clearly |
| Cuts Needed | Utility Knife | Score before cutting |
| Installation Gaps | Spacing Tool | Maintain uniform gaps |
Clear Marking Techniques
Effective marking techniques are essential for achieving precise cuts in vinyl wood planks. Start by using a straight edge or a square to create a clear reference line across the plank. Confirm your measurements are accurate, then mark the cut line with a fine-tip marker or utility knife. This helps prevent smudging or blurring, maintaining clear guidelines for your cuts. When marking curves or intricate shapes, use a flexible measuring tape or a template to transfer the design onto the plank accurately. Always double-check your markings before cutting, as even a small error can lead to wasted material. By following these meticulous marking techniques, you'll gain the freedom to achieve professional-quality results in your flooring project.
Choosing the Right Cutting Method
Choosing the right cutting method is essential for achieving a clean, professional finish when installing vinyl wood plank flooring. You'll encounter various flooring types, each requiring specific cutting techniques. For instance, if you're working with thicker planks, a jigsaw or circular saw may be more effective, while thinner options often allow for simpler methods, such as a utility knife. Consider the layout of your space; intricate cuts around corners may necessitate more precise tools. Additionally, assess your comfort level with the tools at hand. By matching your cutting method to the flooring type and your skill set, you'll guarantee an efficient installation process, allowing you to focus on enjoying your newly transformed space.
Using a Utility Knife
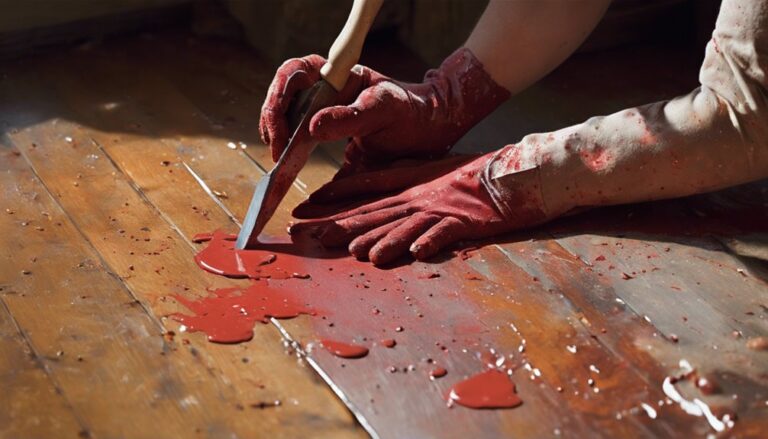
Using a utility knife is one of the simplest and most efficient methods for cutting vinyl wood plank flooring, especially when dealing with thinner planks. Start by measuring and marking your desired cut with a pencil. Utilize a straight edge to guarantee a clean line. When applying utility knife techniques, score along the marked line with steady pressure, making multiple passes if necessary. This enhances cutting precision, allowing the plank to bend and break easily. After you've scored deeply, snap the plank along the score line. For safety, always cut away from your body and maintain a firm grip on the knife. This method not only promotes accuracy but also empowers you to achieve a professional finish with minimal equipment.
Employing a Circular Saw
For larger or thicker vinyl wood planks, employing a circular saw can greatly enhance your cutting efficiency and accuracy. Start with the proper circular saw setup: make certain your workspace is clear, and secure the planks to prevent movement during cutting. Choose a suitable blade for vinyl, typically a fine-toothed carbide blade, to minimize chipping and make certain clean edges. Adjust the depth of the blade to just slightly exceed the thickness of the plank. When you're ready, align the saw with your marked line and maintain a steady pace as you cut, allowing the saw to do the work. This method not only speeds up the process but also provides consistent, precise cuts for your flooring project.
Tips for Accurate Cuts
To achieve precise cuts in vinyl wood plank flooring, it's essential to follow some key practices. Start by measuring twice to guarantee accuracy before making any cuts. Additionally, using a straight edge and selecting the appropriate cutting tools will help maintain straight lines and clean edges.
Measure Twice, Cut Once
Although it may seem straightforward, measuring accurately is essential when cutting vinyl wood plank flooring. Start by determining the length and width you need for each plank. Use a reliable tape measure, ensuring it's straight and taut for precise dimensions. When marking your measurements, double-check them before making any cuts; this is where the adage "measure twice, cut once" becomes vital. Measurement accuracy directly impacts the effectiveness of your cutting techniques. Any discrepancy can lead to wasted materials and additional work. If you're working on irregular spaces, take multiple measurements to capture variations. Following these steps will help you achieve clean, accurate cuts, allowing you more freedom in your flooring project and ensuring a professional finish.
Use a Straight Edge
Achieving precise cuts in vinyl wood plank flooring hinges on the use of a straight edge. By employing a straight edge, you can greatly enhance your accuracy, ensuring clean, straight lines that align perfectly with your measurements. The straight edge benefits include reducing the risk of uneven cuts, which can compromise the overall look of your flooring. To achieve precision, place the straight edge along your marked line, ensuring it's securely held in place. This technique allows for a steady guiding surface when you make your cuts. Remember, the more stable your straight edge, the more control you'll have over the cutting process. This method will empower you to create a professional finish with ease and confidence.
Choose Proper Cutting Tools
Choosing the right cutting tools is essential for achieving accurate cuts in vinyl wood plank flooring. For ideal results, use a utility knife for straight cuts and a jigsaw or circular saw for intricate shapes. Make sure your blades are sharp; dull blades can cause jagged edges and uneven cuts, compromising your project's integrity. Familiarize yourself with various cutting techniques, such as scoring and snapping for quick, straight cuts. Additionally, prioritize tool maintenance—clean and inspect your tools regularly to make sure they function effectively. Properly maintained tools not only enhance precision but also prolong their lifespan. By selecting the right cutting tools and maintaining them, you'll enjoy the freedom to create a flawless flooring installation.
Safety Precautions to Follow
When cutting vinyl wood plank flooring, it's crucial to prioritize safety to prevent injuries. Start by wearing appropriate safety gear, including goggles and gloves, to shield yourself from debris and sharp edges. Make sure your cutting tools are in good condition; a dull blade can lead to accidents.
Next, focus on workspace organization. Clear the area of clutter to minimize trip hazards and create a clean surface for your materials. Position your cutting tools and planks in a way that allows for maximum control and stability during the cutting process.
Always keep your hands away from the blade and maintain a firm grip on the plank. By following these precautions, you can enjoy a safer, more efficient cutting experience.
Installing Cut Planks Properly
To guarantee a successful installation of your cut vinyl wood planks, start by properly acclimating them to the room's temperature and humidity. This helps prevent warping and guarantees stability. When laying the planks, ensure proper plank alignment by starting from a corner and working your way across the room. Use spacers to maintain consistent expansion gaps around the perimeter, allowing for natural expansion and contraction of the material. As you continue, check alignment frequently to avoid misalignment later on. If you encounter any obstacles, like door frames, use a jigsaw for precise cuts. Once the planks are installed, remove spacers and cover the gaps with trim or molding for a polished finish. Enjoy your newly installed flooring!
Frequently Asked Questions
Can I Cut Vinyl Plank Flooring Without Specialized Tools?
Yes, you can cut vinyl plank flooring without specialized tools. By employing simple cutting techniques, like using a utility knife or a straight edge, you can achieve clean cuts. Just mark your measurements carefully and score along the line, snapping the plank afterward. If you're considering flooring alternatives, remember that some may require more advanced tools. However, for vinyl planks, your basic tools can suffice, giving you the freedom to install effectively.
How Thick Are Most Vinyl Wood Planks?
Most vinyl wood planks typically range from 4mm to 8mm in thickness, though vinyl thickness variations do exist. Thicker planks often provide enhanced durability, which is vital for high-traffic areas. When considering plank durability factors, it's important to evaluate wear layers and core materials, as these components directly impact performance. Choosing the right thickness not only affects aesthetics but also guarantees long-term satisfaction in your flooring choice, giving you the freedom to enjoy your space.
Will Cutting Vinyl Planks Create a Lot of Dust?
When you slice through vinyl planks, it's like carving through clouds—light and airy, yet you'll still kick up some dust. The cutting methods you choose, whether a utility knife or a saw, can influence dust production. To manage this, consider using a vacuum or dust collection system to keep your space clean. Embrace the freedom to create while ensuring your environment stays neat, allowing you to focus on your project without distraction.
Can I Reuse Cut-Off Pieces of Vinyl Planks?
Yes, you can definitely reuse cut-off pieces of vinyl planks. Employing reuse techniques not only minimizes waste but also fosters creativity in your projects. For instance, smaller pieces can serve as underlayment or be used to patch areas. Additionally, think about creating custom accents or coasters. By reusing these scraps, you're not just reducing waste, but also enhancing your flooring project while embracing a more sustainable approach to home improvement.
What Is the Best Way to Dispose of Vinyl Flooring Scraps?
So, you thought those vinyl flooring scraps would magically disappear, huh? The best way to dispose of them is through proper waste management. Check local recycling options; many communities have specific programs for vinyl materials. If recycling isn't available, consider contacting a waste disposal service that handles such items responsibly. This way, you're not just tossing them in the landfill but contributing to a more sustainable environment while enjoying your newfound freedom from clutter.