Are you looking to transform your space with a fresh, new look? Laying a tile floor can be a game-changer, giving any room a modern and polished appearance.
Imagine stepping into a kitchen or bathroom that feels like a personal sanctuary. But, if the idea of tackling this project on your own feels overwhelming, you’re not alone. What if I told you that with a little guidance, you could master the art of tiling and achieve professional results without breaking the bank?
This guide is designed specifically for you. You’ll discover simple, step-by-step instructions that make the process manageable and even enjoyable. By the end of this article, you’ll feel confident in your ability to lay a tile floor that not only looks stunning but also stands the test of time. Ready to dive in and unlock the secrets to a flawless tile floor? Let’s get started!
Preparing For The Project
Gather your tools before starting. You will need a tape measure, tile cutter, and level. Don’t forget the spacers and trowel. Make sure to have a mixing bucket and grout float too. A wet saw is helpful for cutting tiles. Safety gear like gloves and goggles is a must. Check you have enough tiles and adhesive.
Use your tape measure. Measure the length and width of the floor. Multiply them to find the area. This gives you the square footage. Always buy extra tiles. This covers mistakes and future repairs.
Choose tiles that fit your room style. Think about the color and size. Larger tiles can make rooms look bigger. Check the tile’s durability for the area. Kitchen and bathroom floors need water-resistant tiles. Always check the tile rating for best use.
Surface Preparation
Make sure the subfloor is clean and dry. Remove any dirt or dust using a broom or vacuum. This helps tiles stick better. A clean floor is a strong base for tiles. Never skip this step.
Check for cracks or holes. Fill them with patching compound. Let it dry before moving on. A smooth floor helps tiles lay flat. This avoids future problems.
Use a primer to seal the floor. This step helps tiles stick well. Apply evenly across the floor. Let it dry completely. A good primer makes a big difference.
Planning The Layout
Picking a pattern is fun and important. There are many patterns to choose. Checkerboard and diagonal are popular. Think about the room size. Small rooms need simple patterns. Big rooms can have complex designs. Sketch your ideas on paper. It helps see how it will look. Use different colors in your design. This can make the floor look interesting.
Mark the floor before laying tiles. Use a chalk line for straight lines. Measure the room carefully. Make sure lines are even and straight. Double-check your measurements. This prevents errors. Clear guidelines help when placing tiles. They ensure tiles are straight. Good guidelines save time and effort later.
Dry lay tiles first. This means placing tiles without glue. It shows how the tiles fit. Start from the center of the room. This helps balance the pattern. Adjust tiles if needed. Make sure edges match up. Dry laying helps spot mistakes early. It’s a smart step before final placement.

Mixing And Applying Adhesive
Mixing and applying adhesive is key in laying a tile floor. Combine the adhesive until smooth, ensuring an even spread for strong bonding. This foundation supports the tiles and prevents any shifting or cracking.
Selecting The Adhesive Type
Choosing the right adhesive is very important. Use ceramic tile adhesive for most indoor spaces. Porcelain tiles need a stronger adhesive. Natural stone tiles require special adhesive too. Always read the product label for the best match.
Mixing Instructions
Start with a clean bucket. Pour in the recommended amount of water. Slowly add the adhesive powder. Stir until there are no lumps. The mix should be like thick paste. Let it rest for a few minutes. Stir again before using.
Spreading The Adhesive
Use a notched trowel to spread adhesive. Hold the trowel at a 45-degree angle. Spread a thin layer on the floor. Make sure it is even. Work on small sections. This keeps adhesive from drying too fast.
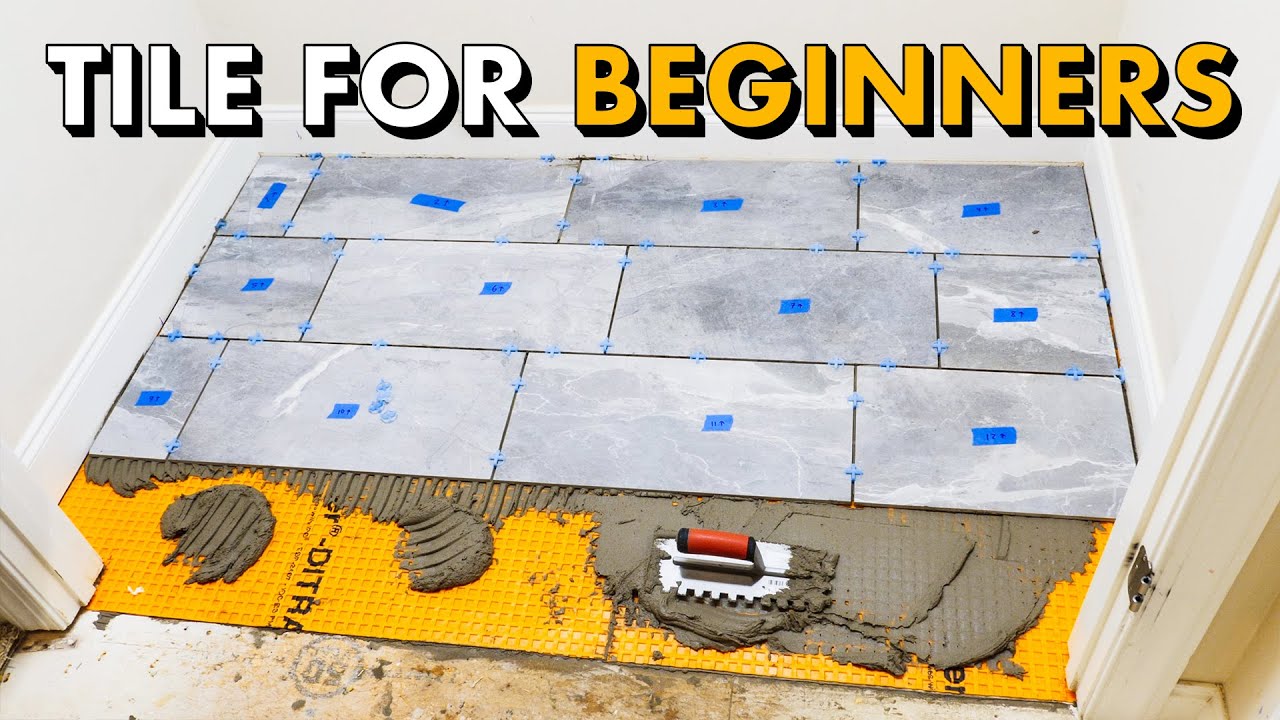
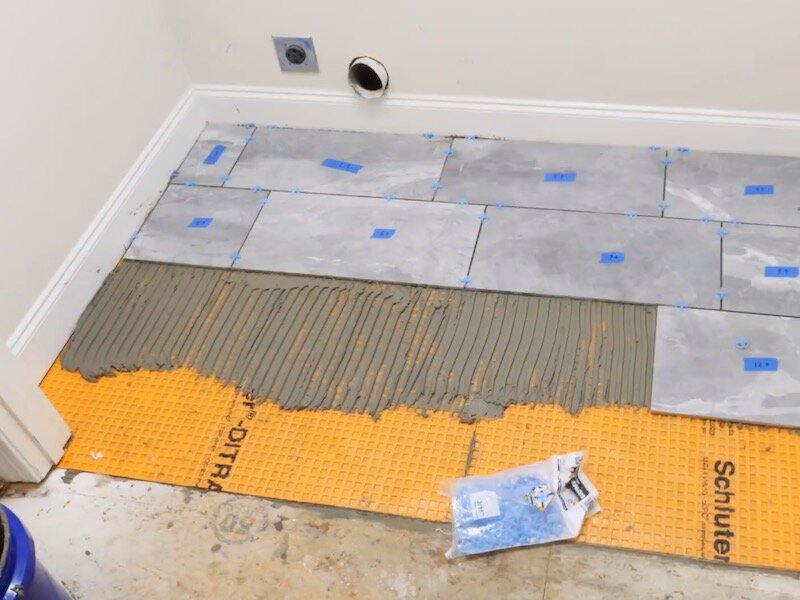
Laying The Tiles
Start at the center of the room. This helps balance the tiles. Apply a thin layer of mortar. Use a notched trowel to spread it evenly. Place the first tile gently. Press it down firmly. Make sure it’s level with the floor.
Tile spacers keep tiles apart. They ensure even gaps. These gaps help with grouting later. Insert spacers between the tiles. Do this every time you place a new tile. This step is crucial for a neat finish.
Measure the space for edge tiles. Use a tile cutter for precision. Mark the tile where it needs cutting. Cut slowly to avoid cracks. Place the cut tile in position. Check it fits well with the others.

Grouting The Tiles
Choosing grout can be tricky. Grout comes in many colors and types. Epoxy grout is strong and water-resistant. Cement grout is easy to use. Pick a grout that matches your tiles. Bright colors make tiles pop. Dark colors hide dirt.
Follow the instructions on the grout package. Use a clean bucket for mixing. Add water slowly to the grout powder. Stir with a stick or mixer. The mix should be like peanut butter. Let the grout sit for a few minutes. Stir again before using.
Use a rubber float to apply grout. Spread it over the tiles. Hold the float at an angle. Press grout into the gaps. Wipe away extra grout with a damp sponge. Clean the tiles gently. Let the grout dry before walking on tiles.
Finishing Touches
After tiling, clean the extra grout from the tiles. Use a damp sponge. Wipe gently to avoid scratching the surface. Rinse the sponge often. This keeps it clean. Repeat until tiles are clear.
Sealing helps protect the tiles. It prevents water from damaging them. Use a good quality sealer. Apply with a brush or sponge. Follow the instructions on the product. Let the sealer dry well.
Polishing makes the tiles shine. Use a soft cloth or mop. Buff the tiles in circles. This helps bring out their natural shine. Polishing also keeps tiles looking new.
Troubleshooting Common Issues
Uneven tiles can cause people to trip. It’s important to fix them. Use a level to check tile height. Press gently on raised tiles. This helps them stick better. Add more adhesive if needed. Let tiles sit for a day. This keeps them in place.
Grout haze looks like a cloudy film. Wipe tiles with a damp cloth. This removes some haze. Mix water and vinegar equally. Use this mixture to clean tiles. Rinse with water and dry with a cloth. Tiles should look shiny and clean now.
Cracks make tiles look bad. Check the surface before tiling. It should be flat and clean. Use a strong adhesive. This keeps tiles from moving. Leave small spaces between tiles. It allows them to expand. This helps prevent cracks.
Maintenance Tips
Preparing to lay a tile floor? Start with a clean, level surface to ensure tiles adhere well. Use spacers for even gaps, and apply grout smoothly to finish. Regularly check for alignment to avoid uneven tiles.
Regular Cleaning Advice
Sweep the tile floor weekly. Use a soft broom. Mop with warm water monthly. Avoid harsh chemicals; they can damage tiles. Vinegar and water work well. Dry the floor with a clean towel. Wet tiles can be slippery. Regular cleaning helps tiles last longer.
Sealant Reapplication
Reapply sealant every two years. It protects tiles from stains. Check for wear and fading. Use a brush for application. Ensure tiles are dry before starting. Follow instructions on the sealant bottle. Let it dry completely. Sealant keeps tiles looking new.
Addressing Wear And Tear
Tiles can crack over time. Check for chips monthly. Small cracks can grow. Replace damaged tiles quickly. Use grout to fill gaps. Prevent water damage. Avoid heavy impacts on tiles. Keep furniture off tiles. Move items with care.
Frequently Asked Questions
What Tools Are Needed To Lay Tile Flooring?
You’ll need a tile cutter, trowel, grout float, and spacers. A level and tape measure are essential for precision. Safety gear like gloves and goggles is recommended. Ensure you have tile adhesive and grout. A mixing bucket and sponge are useful for cleaning and finishing.
How Long Does It Take To Install Tiles?
Installation time varies by room size and complexity. A small room may take a day, while larger areas can take longer. Preparation and drying times are crucial. Allow grout to set overnight before walking on the tiles. Efficiency improves with experience and planning.
Can I Tile Over Existing Flooring?
Yes, you can tile over certain floors like concrete or vinyl. Ensure the existing floor is clean, level, and stable. Avoid tiling over uneven or damaged surfaces. Proper surface preparation ensures adhesion. Consult a professional if unsure about compatibility or structural integrity.
What Type Of Tile Is Best For Floors?
Ceramic and porcelain tiles are popular choices for flooring. They are durable, moisture-resistant, and easy to clean. Consider slip resistance and style preferences. Natural stone offers a unique look but requires sealing. Evaluate your budget and maintenance needs before choosing.
Conclusion
You’ve learned the essentials of laying a tile floor. Start with careful planning and preparation. Choose the right tiles for your space. Measure accurately and cut tiles neatly. Apply adhesive evenly. Ensure tiles are aligned properly. Allow time for the adhesive to set.
Grout carefully to finish the floor. These steps lead to a durable and beautiful tile floor. With patience and attention, you can create a space that shines. Enjoy your new floor, and remember to care for it regularly. Your hard work will be worth it, creating a stunning transformation.