To restore wood floors, start by evaluating their condition for scratches, dents, and any signs of water damage. Clean the floors thoroughly using a damp mop and wood-safe cleaner. For minor scratches, use touch-up products; deeper ones may need wood filler. Once repaired, sand the surface, starting with coarse grit, then progressing to finer sandpaper. After sanding, apply your desired finish or stain and allow ample drying time. To keep your floors looking great, establish a routine maintenance schedule. If you're unsure about any steps or face extensive damage, expert help can guarantee your floors' beauty and integrity.
Assessing the Condition
Before diving into the restoration process, it is crucial to assess the condition of your wood floors. Start by using visual inspection techniques to look for common floor damage indicators. Check for scratches, dents, or discoloration that might signal deeper issues. Pay attention to areas near furniture or high-traffic zones, as these often show the most wear. Look for gaps between the boards or signs of water damage, like cupping or warping. Don't forget to inspect the finish; a worn-out surface may need refinishing or even complete replacement. Taking the time to evaluate your floors thoroughly will help you determine the best approach for restoration, ensuring your wood floors get the care they truly deserve.
Gathering Necessary Supplies
Before you start restoring your wood floors, it's imperative to gather the right supplies. You'll need essential cleaning tools like a vacuum, mop, and gentle wood cleaner, along with repair materials such as wood filler, sandpaper, and finish. Having everything on hand will make the process smoother and more efficient.
Essential Cleaning Tools
While restoring wood floors can seem intimidating, having the right cleaning tools at your disposal makes the process much smoother. Start with a high-quality broom and dustpan to remove dirt and debris. A microfiber mop works wonders for applying cleaning solutions without damaging the wood. You'll also need a bucket for mixing solutions and a soft cloth for polishing. Don't forget to grab floor protectors to prevent future scratches; these are essential for maintaining your newly restored floors. When selecting cleaning solutions, opt for those specifically designed for wood to avoid any harmful chemicals. With these essential tools in hand, you'll be well on your way to achieving beautiful, revitalized wood floors that radiate freedom and style.
Repair Materials Needed
To successfully restore your wood floors, gathering the right repair materials is essential for achieving long-lasting results. Start with a quality wood filler, which will help you fill in any cracks or holes. Look for a filler that matches your floor's color for a seamless finish. Repair kits can also be a lifesaver; they often contain everything you need in one package, including sandpaper, applicators, and stain. Make sure to have some clean rags on hand for cleanup, as well as a putty knife for applying the wood filler smoothly. Ultimately, don't forget a sealant to protect your newly restored floors. With the right materials, you'll be well on your way to revitalizing your space!
Cleaning the Floors
Cleaning your wood floors is essential for maintaining their beauty and longevity, especially since dirt and grime can dull their finish over time. Start by sweeping or vacuuming to remove loose debris. For deeper cleaning, consider using eco-friendly cleaners that won't harm your floors or the environment. Mix a solution of vinegar and water—just a cup of vinegar in a gallon of water works wonders. When using this floor cleaning technique, dampen a microfiber mop rather than soaking your floors. This way, you avoid excess moisture that can damage the wood. Remember to clean in the direction of the grain for a polished look. Regularly maintaining your floors will keep them looking fresh and extend their lifespan considerably.
Repairing Scratches and Dents
When it comes to repairing scratches and dents in your wood floors, the first step is identifying the type of damage. Different scratches may require various DIY repair techniques, from simple waxing to more involved methods like wood filler. By understanding the specific issues, you can choose the right approach to restore your floors effectively.
Identifying Scratch Types
Ever wondered how to differentiate between various types of scratches on your wood floors? Identifying the scratch types is essential for effective repair. Surface scratches are light and usually affect the finish without penetrating the wood. These can often be addressed with simple scratch removal products. Deeper scratches, however, reach the wood itself and require more extensive restoration. Dents, on the other hand, can be caused by heavy objects and might need steam treatment or filler. Knowing these distinctions helps you in scratch prevention and choosing the right repair method. Always assess the damage before proceeding, as this can save you time and effort in restoring your beautiful wood floors to their original glory.
DIY Repair Techniques
After you've identified the types of scratches and dents on your wood floors, it's time to tackle the repairs. Start with minor scratches—use a wood stain marker that matches your floor color. For deeper scratches, consider using a blend of beeswax and a bit of sawdust. Dents can often be steamed out by placing a damp cloth over the area and applying heat.
Here's a quick reference table for your DIY repair techniques:
| Scratch/Dent Type | Repair Technique |
|---|---|
| Minor Scratch | Wood stain marker |
| Deep Scratch | Beeswax and sawdust blend |
| Small Dent | Steam method |
| Large Dent | Wood floor refinishing |
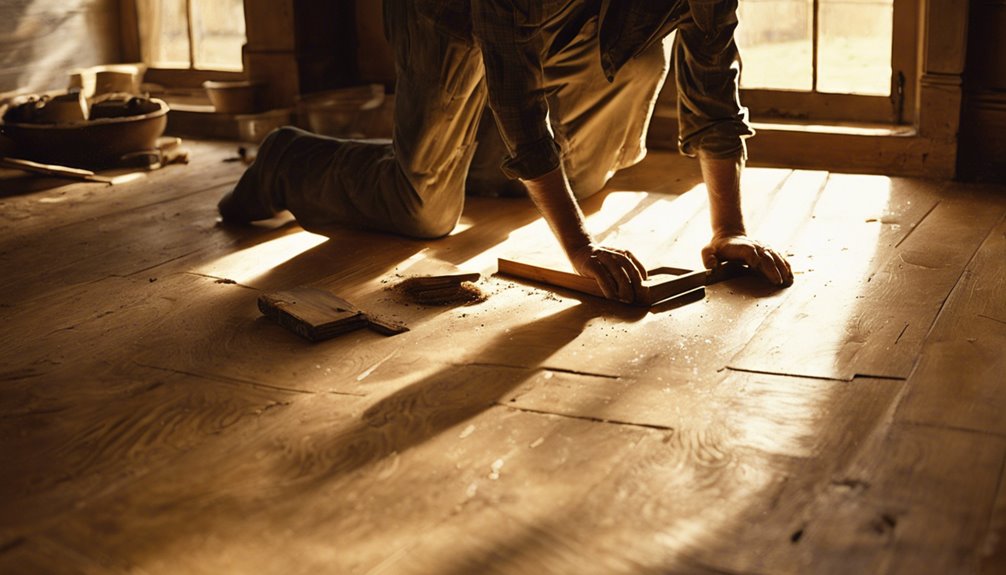
Sanding the Surface
Sanding the surface of your wood floors is essential for achieving a smooth, even finish. To start, gather the right sanding equipment, such as a drum sander for large areas and an edger for corners. Choose appropriate sanding techniques: begin with coarse grit sandpaper to remove old finish and imperfections, then progress to finer grits for a polished look. Work in the direction of the grain to avoid scratches and guarantee an even surface. Don't rush—take your time to move methodically across the floor. Always wear a mask to protect against dust, and guarantee proper ventilation. Once you've achieved a smooth surface, you're ready for the next step in restoring your beautiful wood floors. Enjoy the freedom of a job well done!
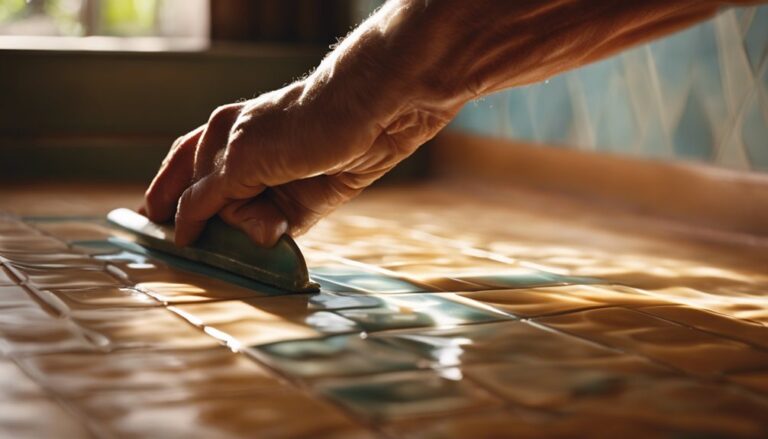
Applying Finish or Stain
With a smooth surface prepared from sanding, you're ready to enhance the beauty of your wood floors by applying a finish or stain. Choosing the right stain types is essential for achieving your desired look. Here's how to proceed:
- Select Your Stain: Decide between oil-based or water-based stains, considering factors like drying time and color intensity.
- Prepare for Application: Verify the area is clean and well-ventilated. Gather your tools, like brushes or rollers.
- Apply the Finish: Start with the edges and work your way in, applying even strokes for a consistent finish application.
Make sure to follow the manufacturer's instructions for the best results, giving your floors a fresh, vibrant look you'll love.
Drying and Curing Time
While it may be tempting to walk on your newly finished wood floors right away, understanding the drying and curing time is vital for achieving the best results. Typically, the initial drying period can take anywhere from a few hours to a couple of days, depending on the finish used and your chosen drying techniques. It's important to allow proper ventilation for faster drying. Curing, on the other hand, takes longer—up to several weeks—because curing agents in the finish need time to fully harden. During this period, avoid heavy foot traffic and placing furniture back. Patience is key; rushing the process could lead to dents or uneven surfaces. So, give your floors time to breathe and develop that perfect finish.
Maintaining Your Floors
To keep your wood floors looking their best, regular maintenance is essential. Implementing preventative measures and conducting routine inspections can save you time and money in the long run. Here are three key steps to maintain your floors:
- Sweep and Mop: Regularly sweep or vacuum to remove dirt and debris. Use a damp mop with a wood-safe cleaner to maintain shine.
- Check for Damage: During routine inspections, look for scratches, dents, or water damage. Addressing these issues early can prevent further deterioration.
- Use Area Rugs: Place area rugs in high-traffic zones to minimize wear and tear. They add style while protecting your wood floors.
When to Call a Professional
Even with regular maintenance, there are times when your wood floors might require professional attention. If you notice deep scratches, excessive fading, or significant water damage, those are clear signs you need to hire a professional. Also, if your floors have become uneven or squeak loudly, it's essential to address these issues promptly. Professional restoration can guarantee that your floors are not only aesthetically pleasing but also structurally sound. If you're considering refinishing but feel unsure about the process or tools needed, it's best to consult an expert. Trust your instincts; if you feel overwhelmed or the damage seems extensive, don't hesitate to call in a pro. They'll help restore your floors to their former glory with ease.
Frequently Asked Questions
Can I Restore Wood Floors Without Sanding?
Yes, you can restore wood floors without sanding. Instead, consider refinishing options like applying a wood floor restorer or a polyurethane finish. These products can rejuvenate your floors and cover minor scratches. For better results, clean your floors thoroughly before applying any treatment. You can also maintain their beauty with regular cleaning and using area rugs to minimize wear. Remember, proper maintenance can extend the life of your wood floors considerably!
What Types of Wood Floors Can Be Restored?
You might think only solid hardwood can be restored, but that's not true. Both solid hardwood and engineered wood floors can often be rejuvenated. Solid hardwood, with its thick surface, can withstand sanding and refinishing multiple times. Engineered wood, while thinner, can still be restored if it has enough wear layer left. So, don't hesitate to explore options; you can breathe new life into your floors without necessarily replacing them.
How Often Should I Restore My Wood Floors?
You should aim to restore your wood floors every 5 to 10 years, depending on your lifestyle and the wear they experience. For high-traffic areas, consider more frequent restoration. Maintenance tips include regular sweeping, using furniture pads, and avoiding harsh cleaners. Staying on top of minor scratches and scuffs can extend the time between restorations, giving you the freedom to enjoy your beautiful floors without constant worry about their condition.
Is It Safe for Pets During the Restoration Process?
When you're considering the restoration process, pet safety is essential. It's best to keep your pets out of the area while you're working, as the fumes from products can be harmful. Also, restoration precautions like securing the space can prevent pets from wandering in and getting hurt. Make sure to ventilate the area well, and once the process is complete, allow a few hours for the space to air out before letting your pets back in.
What Are the Common Mistakes to Avoid When Restoring Wood Floors?
When restoring wood floors, it's easy to make common mistakes. One big one is rushing the restoration techniques, which can lead to a subpar finish. You should also avoid skipping essential maintenance tips, like proper sanding and sealing. Not using the right products can damage the wood, too. Finally, don't forget to test stains or finishes in a small area first; you don't want to ruin your entire floor with a poor choice!