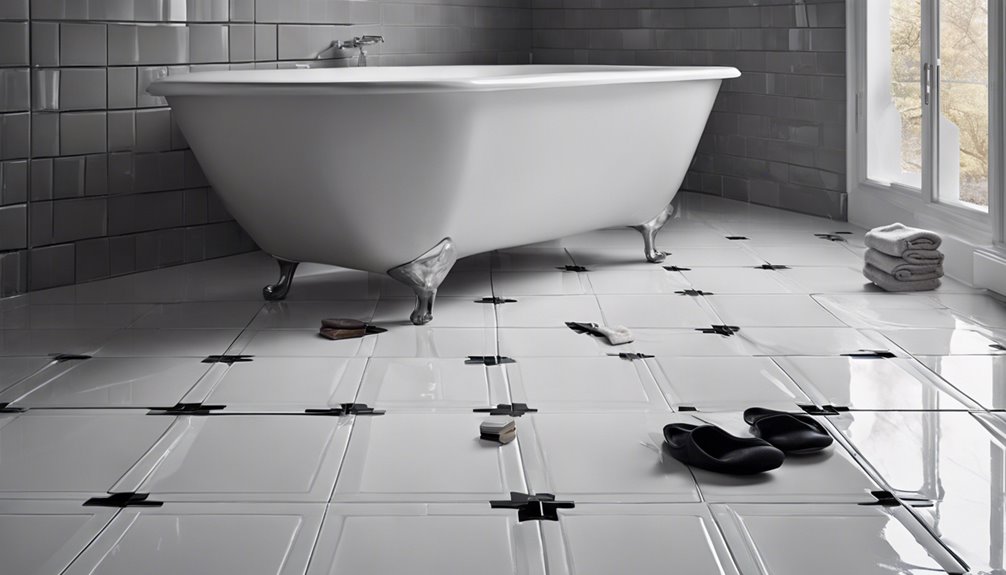
To tile your bathroom floor, start by gathering essential tools like a tile cutter, notched trowel, and tile spacers. Choose moisture-resistant tiles, such as porcelain or ceramic, and consider colors and textures that complement your space. Clean the existing floor surface and check for levelness, repairing any low spots as needed. Measure the area, sketch a layout, and mark your starting point for symmetry. Apply adhesive evenly, lay the tiles with spacers, and once set, grout the gaps. Finally, seal the grout for durability. You'll find even more tips to guarantee a perfect finish if you explore further.
Gather Necessary Tools
Before diving into your tile project, it's vital to gather the right tools. Proper tool selection can make all the difference in achieving a professional finish. Start with a tile cutter or wet saw, which are essential for cutting various tile types. You'll also need a notched trowel for applying adhesive evenly, a tile spacers to guarantee consistent gaps, and a level to keep everything straight. Don't forget a rubber mallet for tapping tiles into place without damage. A grout float will help you apply grout smoothly, while a sponge makes sure you clean up excess. With these tools at hand, you'll be well-equipped to tackle your bathroom floor and release your creativity.
Choose the Right Tile
Choosing the right tile can set the tone for your entire bathroom. You'll want to take into account various tile materials and color selection to guarantee your space reflects your style and serves its purpose. Here are some aspects to keep in mind:
- Tile Materials: Opt for durable options like porcelain or ceramic, which resist moisture and wear.
- Color Selection: Light colors can make a small bathroom feel larger, while darker shades add warmth and coziness.
- Texture: Think about slip-resistant tiles for safety, especially in wet areas.
Prepare the Floor Surface
Before you start tiling, you'll need to prepare the floor surface properly. Begin by cleaning the existing surface thoroughly to remove any dirt, grease, or old adhesive. Once it's clean, check for levelness; any uneven spots can lead to problems with your tile installation down the line.
Clean Existing Surface
Start by thoroughly cleaning the existing surface where you'll be installing your new tile. Different surface types, like concrete, plywood, or vinyl, require specific cleaning methods to guarantee a solid foundation for your tiles.
- Remove any old adhesive, grout, or debris.
- Use a suitable cleaner to eliminate dirt and grease.
- Rinse the surface and allow it to dry completely.
Make certain you're diligent in this step; a clean surface will promote better adhesion for your tiles, preventing future issues. Don't overlook the importance of prepping your floor properly, as it sets the stage for a stunning and long-lasting tile installation. Your hard work now will pay off later in both aesthetics and durability.
Check for Levelness
Verifying your floor is level is vital for a successful tile installation; even a slight unevenness can lead to cracked tiles and uneven grout lines. Start by using a level tool to check different areas of the floor. If you find low spots, consider using self-leveling compound as a leveling technique to create a smooth surface. This step is important to avoid future headaches.
| Importance of Levelness | Leveling Techniques |
|---|---|
| Prevents cracked tiles | Self-leveling compound |
| Guarantees even grout lines | Floor patching products |
| Enhances aesthetic appeal | Slope correction methods |
| Facilitates easy tile placement | Shimming for support |
| Increases longevity of tiles | Grinding high spots |
Taking the time to verify levelness now will lead to a beautiful, long-lasting tile floor.
Measure and Plan Layout
Measuring and planning your tile layout is essential for achieving a professional-looking bathroom floor. Start by determining the floor dimensions and sketching a rough layout. This helps visualize how different tile patterns will look in your space. You want to avoid awkward cuts and guarantee a balanced appearance.
- Choose your tile pattern: Consider how the tiles will align and flow.
- Mark your starting point: Center your layout for symmetry, especially if your tiles are patterned.
- Calculate tile quantity: Factor in waste and cuts to avoid running out mid-project.
With a solid plan in place, you'll have the freedom to create a stunning floor that emphasizes your style and enhances your bathroom's overall look.
Cut Tiles as Needed
With your layout planned and tiles selected, the next step is to cut tiles as needed to fit your bathroom floor perfectly. Start by measuring the areas where tiles need to be adjusted, especially around edges, fixtures, or corners. Use a tile cutter or a wet saw for precise tile cutting, ensuring clean edges. Remember, tile shapes can vary, so take your time to find the right angle and fit for each piece. If you're working with intricate designs or patterns, it's essential to plan your cuts carefully to maintain visual harmony. Always wear safety gear and follow the tool instructions for the best results. With attention to detail, you'll achieve a professional finish that enhances your space.
Apply Adhesive Properly
Applying adhesive properly is essential for a durable tile installation, and you'll want to get it right from the start. Choosing the right adhesive types—like thin-set mortar or mastic—depends on your tile and the subfloor. Before you begin, verify your surface is clean and dry.
Use these application techniques for the best results:
- Notched Trowel: Apply the adhesive evenly, using a notched trowel to create ridges that help with tile grip.
- Back Buttering: For larger tiles, consider back buttering to verify full coverage and adhesion.
- Consistent Pressure: When placing tiles, press down firmly to embed them into the adhesive.
Master these steps, and your tiles will stay put for years to come!
Grout the Tiles
Once your tiles are set, it's time to grout them properly. You'll need to choose the right type of grout based on your tile and bathroom conditions, as this can impact durability and maintenance. After selecting the grout, applying it effectively will guarantee a neat finish and prevent water from seeping beneath your tiles.
Choosing the Right Grout
Choosing the right grout is essential for both the appearance and durability of your bathroom floor tiles. You'll need to evaluate different grout types and colors to achieve the look you desire while ensuring longevity. Here are some key points to keep in mind:
- Grout Types: Choose between sanded or unsanded grout based on the width of your joints.
- Grout Colors: Opt for a color that complements your tiles, but don't shy away from bold choices for a striking contrast.
- Sealing: Determine whether you need a pre-mixed grout or one that requires sealing to prevent moisture damage.
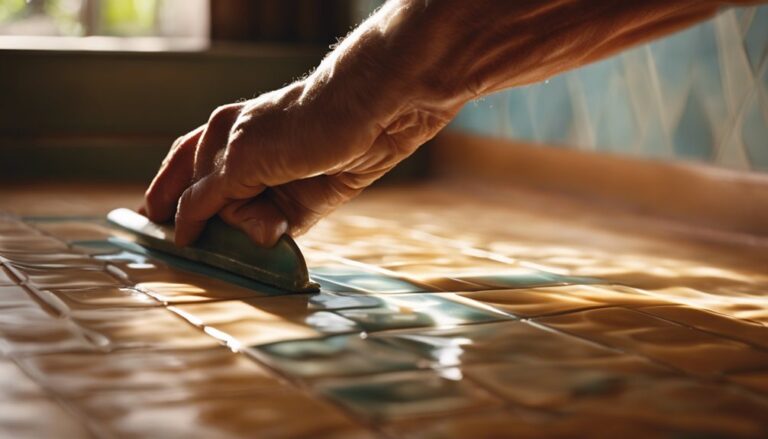
Applying Grout Effectively
With the right grout selected, you're ready to move on to the application process, which plays a significant role in the final look of your tiled floor. Begin by mixing your grout as per the manufacturer's instructions, ensuring it's smooth and lump-free. Use a grout float to apply the grout diagonally across the tiles, pushing it into the gaps. This technique helps fill them effectively. Once you've covered the area, let it sit for about 15 minutes, then wipe excess grout off the tile surface with a damp sponge. Pay attention to grout color selection, as it can enhance or detract from your design. Finally, allow the grout to cure completely before walking on your new floor, ensuring lasting beauty.
Seal and Maintain Floor
Sealing and maintaining your bathroom floor is essential to preserve its beauty and longevity. Regular floor maintenance not only enhances the appearance but also protects against moisture and stains. Here are some effective sealing techniques to keep in mind:
- Choose the right sealer: Depending on your tile type, opt for a penetrating or topical sealer.
- Apply sealer evenly: Use a sponge or roller for consistent coverage, ensuring you reach all grout lines.
- Reapply regularly: Depending on foot traffic, reseal every 1-3 years to maintain protection.
Frequently Asked Questions
How Long Does Tiling a Bathroom Floor Usually Take?
Tiling a bathroom floor is like painting a masterpiece; it takes time and precision. Typically, tile installation time can range from a few hours to a couple of days, depending on the size of the space and your experience. Proper project planning is essential to guarantee you have all the materials ready and know the layout. By taking your time, you'll create a beautiful floor that adds value and style to your home.
Can I Tile Over Existing Flooring?
You can tile over existing flooring, but there are pros and cons to take into account. The main advantage is saving time and effort on flooring preparation, as you won't need to remove the old floor. However, it can lead to uneven surfaces or height issues if the existing flooring isn't flat. Make sure to assess the condition of the old floor and verify it's suitable for tiling to avoid future problems.
What Type of Grout Is Best for Bathrooms?
When choosing grout for your bathroom, consider epoxy grout or unsanded grout. Epoxy grout's durable and water-resistant, making it ideal for wet areas, while unsanded grout's better for smaller joints and provides a smoother finish. If you want longevity and easy maintenance, go for epoxy. Just remember, unsanded grout's easier to work with for DIY projects. Think about your specific needs and preferences to make the best choice for your space!
Should I Use Thin-Set or Mastic Adhesive?
Imagine building a sturdy bridge; you wouldn't use flimsy materials, right? When it comes to adhesive for your tiles, thin-set is often the stronger choice. Its advantages include better moisture resistance and a stronger bond, essential for wet areas. Mastic, on the other hand, has limitations in high-humidity environments, potentially leading to peeling. For a long-lasting finish, opt for thin-set, ensuring your floor stands the test of time and water.
How Do I Fix a Cracked Tile After Installation?
If you've got a cracked tile, you've got a couple of tile replacement options. First, you can try a cracked tile repair method, using epoxy or adhesive to fill the crack. If that doesn't work or the damage is too severe, you'll need to replace the tile entirely. Carefully remove the broken tile, clean the area, and install a new one, ensuring it matches the surrounding tiles for a seamless look.